How to set up your Original watermark
The Original watermark is the watermark on photos you upload with Original Upload. Kamero adds it each time a photo is shown, so you can change it at any time and every photo updates. You can place more than one logo, move it anywhere on the photo, and give a single event its own watermark.
Original and Standard watermarks
- Original watermark: for Original Upload. Your files are stored as you uploaded them, and the watermark is shown on top. Change it and all photos update, including old ones.
- Standard watermark: for Standard Upload. It is added while the photo uploads, so changes apply only to new uploads. See Standard watermark.
Neither watermark costs extra. Original uploads count as 2 photos each toward your photo limit, which is why the event page shows Counts as 2x next to Original Upload.

How to open the Original watermark page
Use any of these:
- On an event page, click Original Watermark next to Original Upload.
- Click the palette icon in the top menu, then click Configure on the Original Watermark card.
- If you are already on the watermark page, click the Original watermark tab.
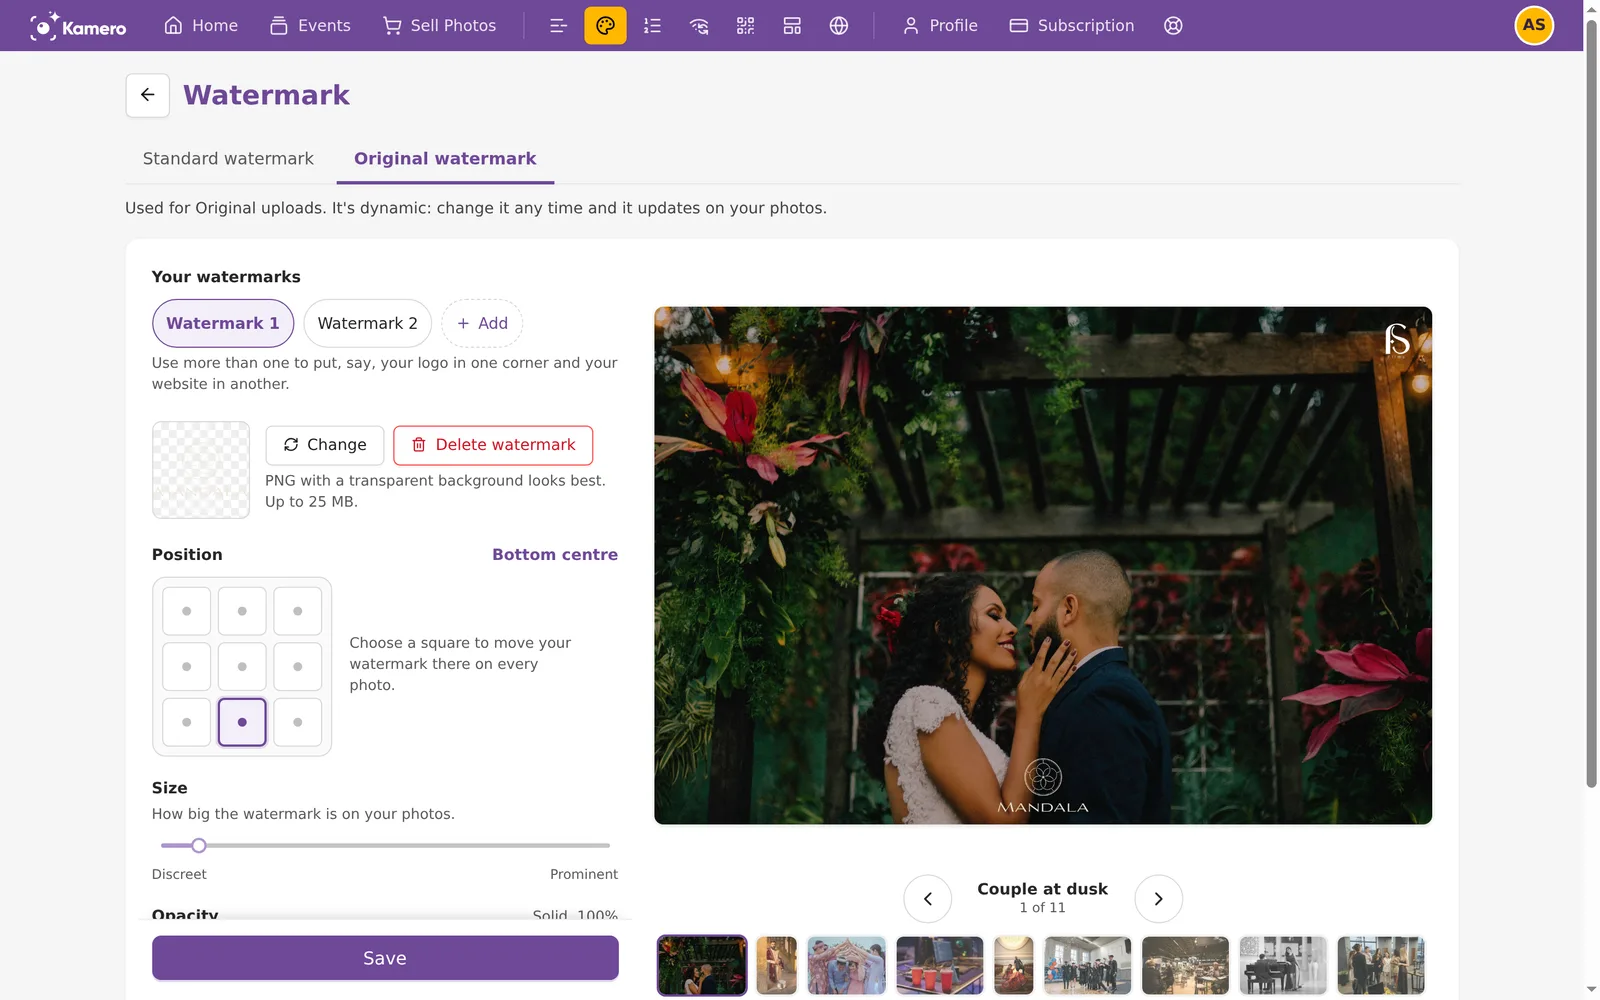
The note at the bottom, Applies to all your events, unless an event has its own, means this is your account watermark.
Set up your watermark
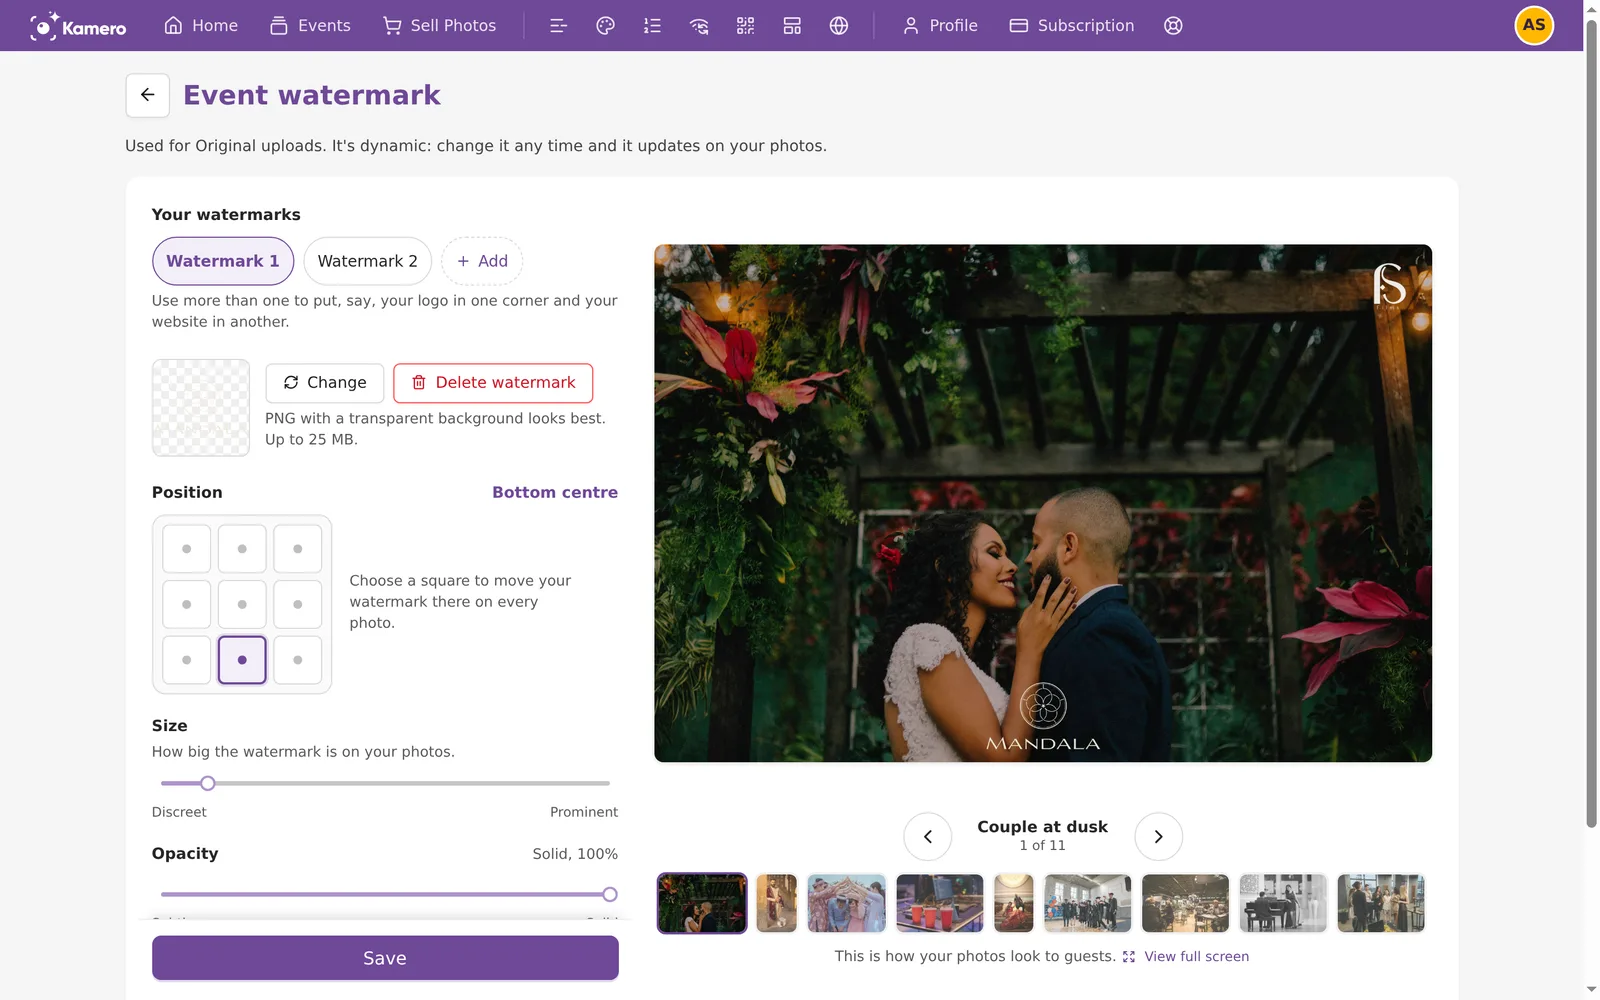
- Click Choose image (or Change if one is already there) and pick a logo or text image from your Asset Manager.
- Under Position, click one of the nine squares.
- Drag the Size and Opacity sliders.
- If you need to, open Fine-tune position to move it a few pixels.
- Check the sample photos on the right.
- Click Save. Until you do, You have unsaved changes. shows under the button.
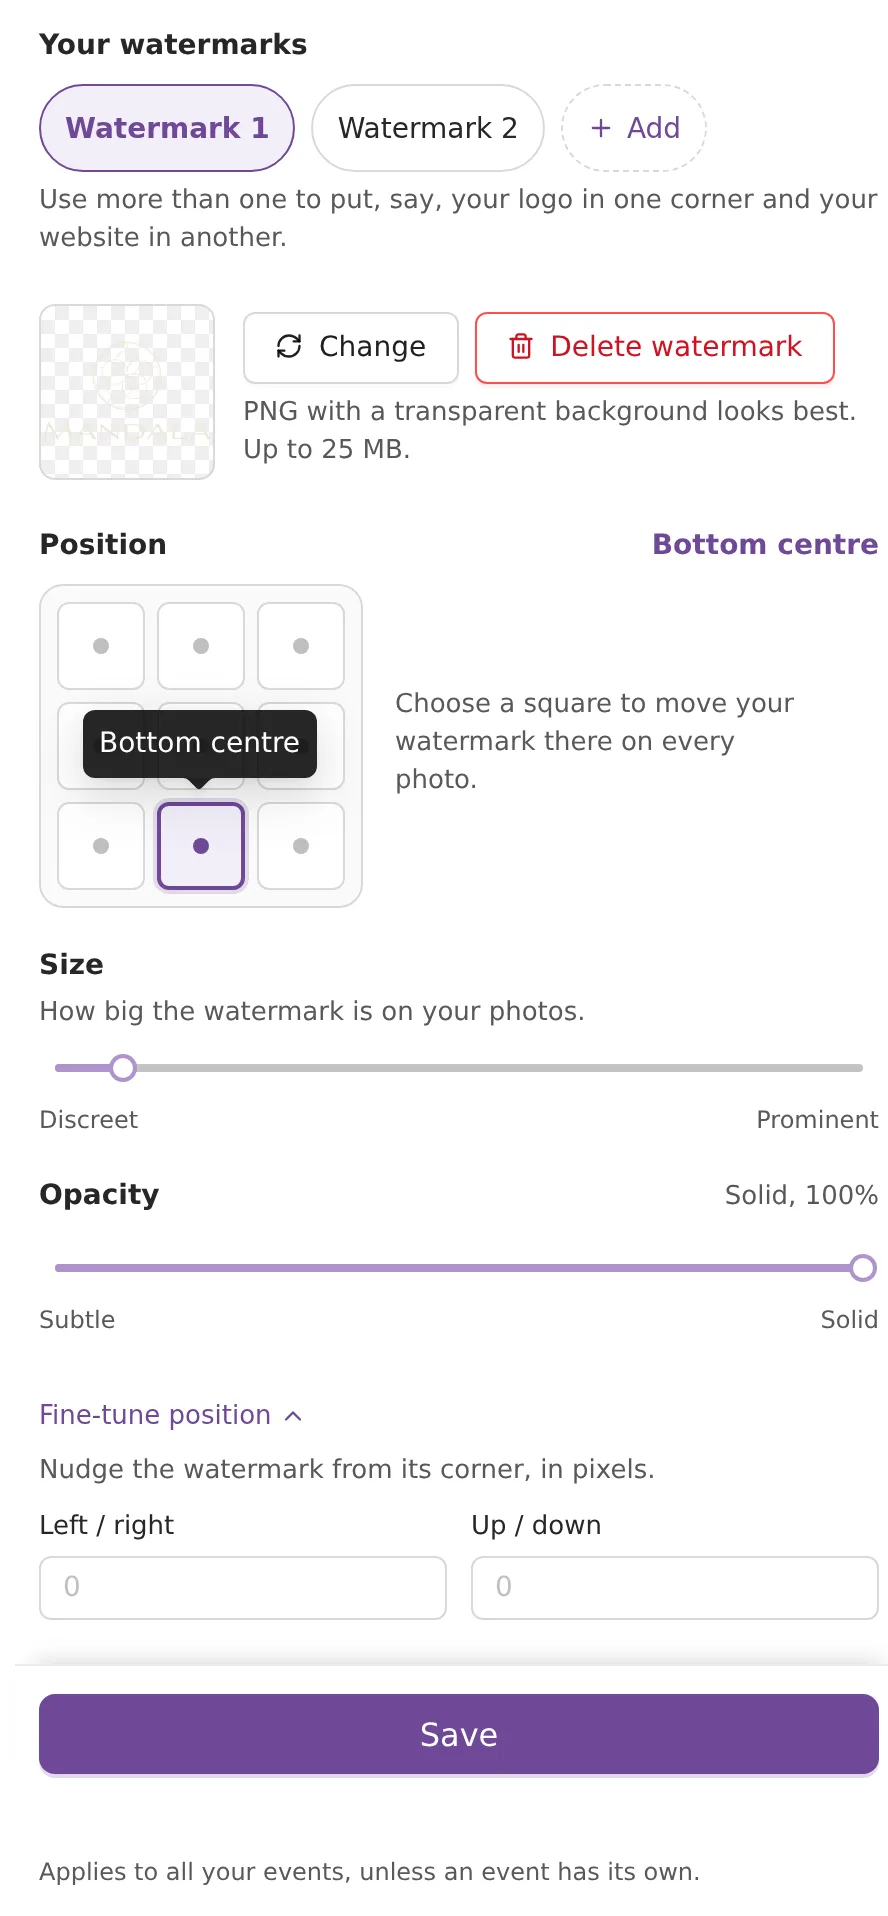
Position
The grid has nine squares: the four corners, the middle of each edge, and the centre. The name of the one you picked shows at the top right, for example Bottom centre.
Size
Size sets how wide the watermark is, from Discreet to Prominent. It is measured against the photo's width, so it looks the same on large and small photos. It starts at 10%.
Opacity
Opacity goes from Subtle (see-through) to Solid (Solid, 100%). A lower value keeps a large logo from covering the photo.
Fine-tune position
Click Fine-tune position to show the Left / right and Up / down boxes. Type a number of pixels to nudge the watermark away from the square you picked. Click Reset to the corner to put it back.
Add a second watermark
Click + Add under Your watermarks. Each one gets its own chip, Watermark 1, Watermark 2 and so on, with its own image, position, size and opacity. Click a chip to edit that watermark. All of them show on every photo.
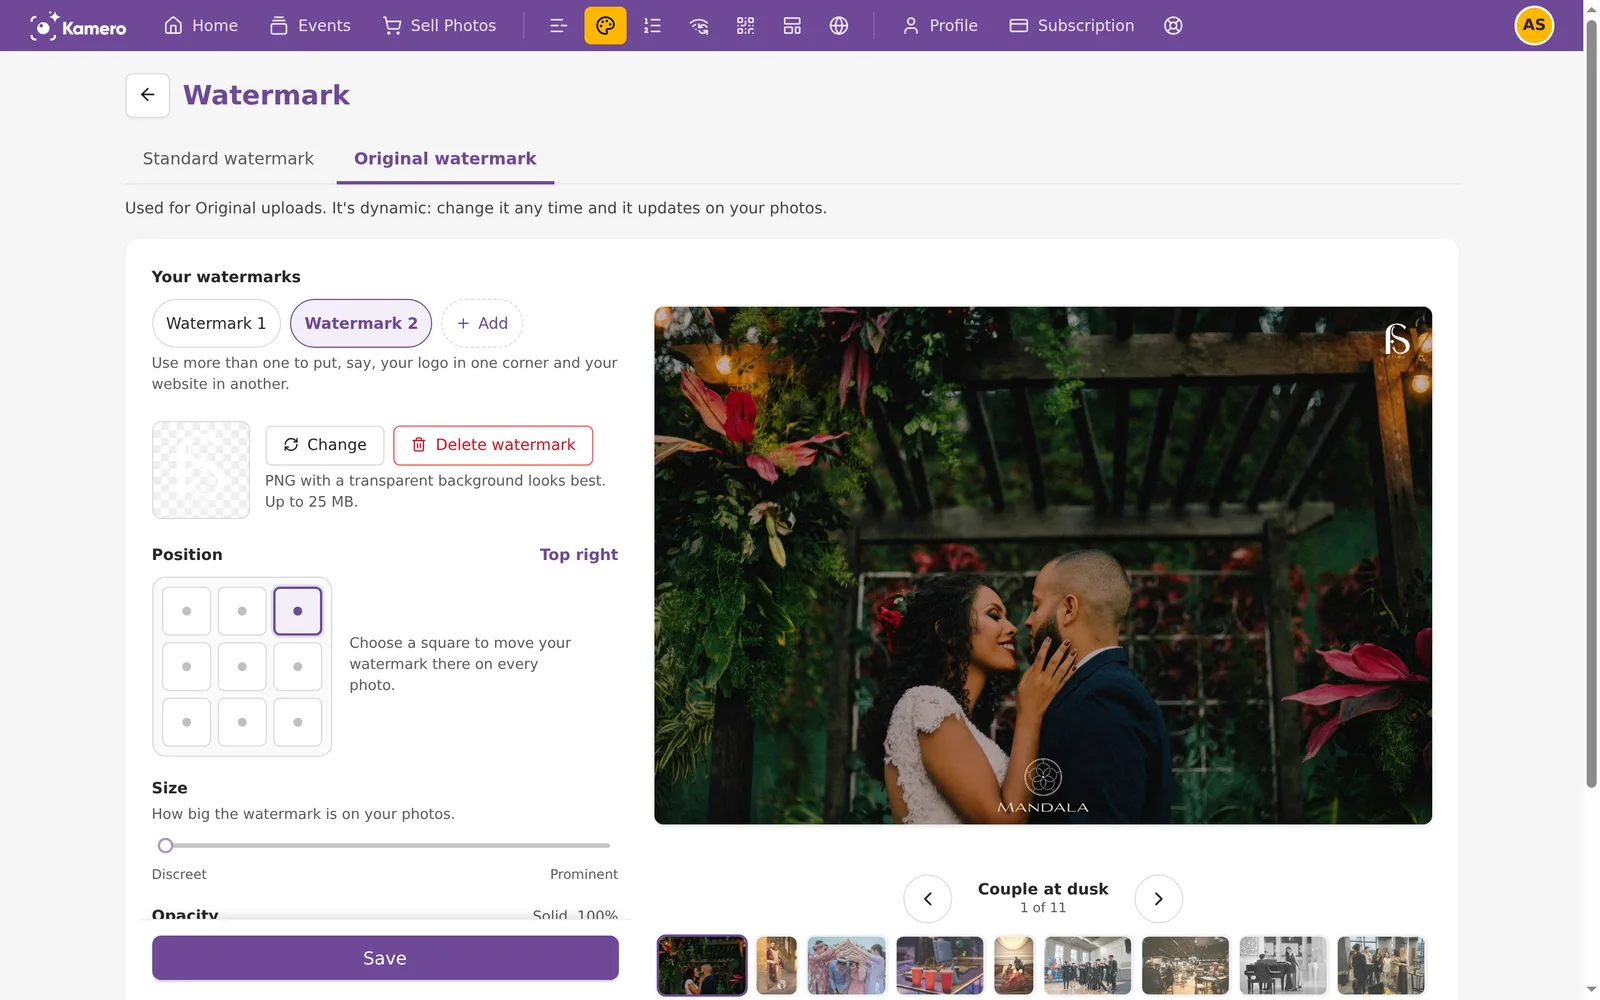
To remove one, select its chip and click Delete watermark, then confirm with Remove. Click Save afterwards.
Pick or upload a logo
Change opens the Asset Manager, where your logos and text images are kept. To add a logo, click the upload box or drag a file onto it. JPEG, PNG, GIF and WebP up to 25 MB work. A PNG with a transparent background looks best. The counter shows how many of your 20 spaces you have used.
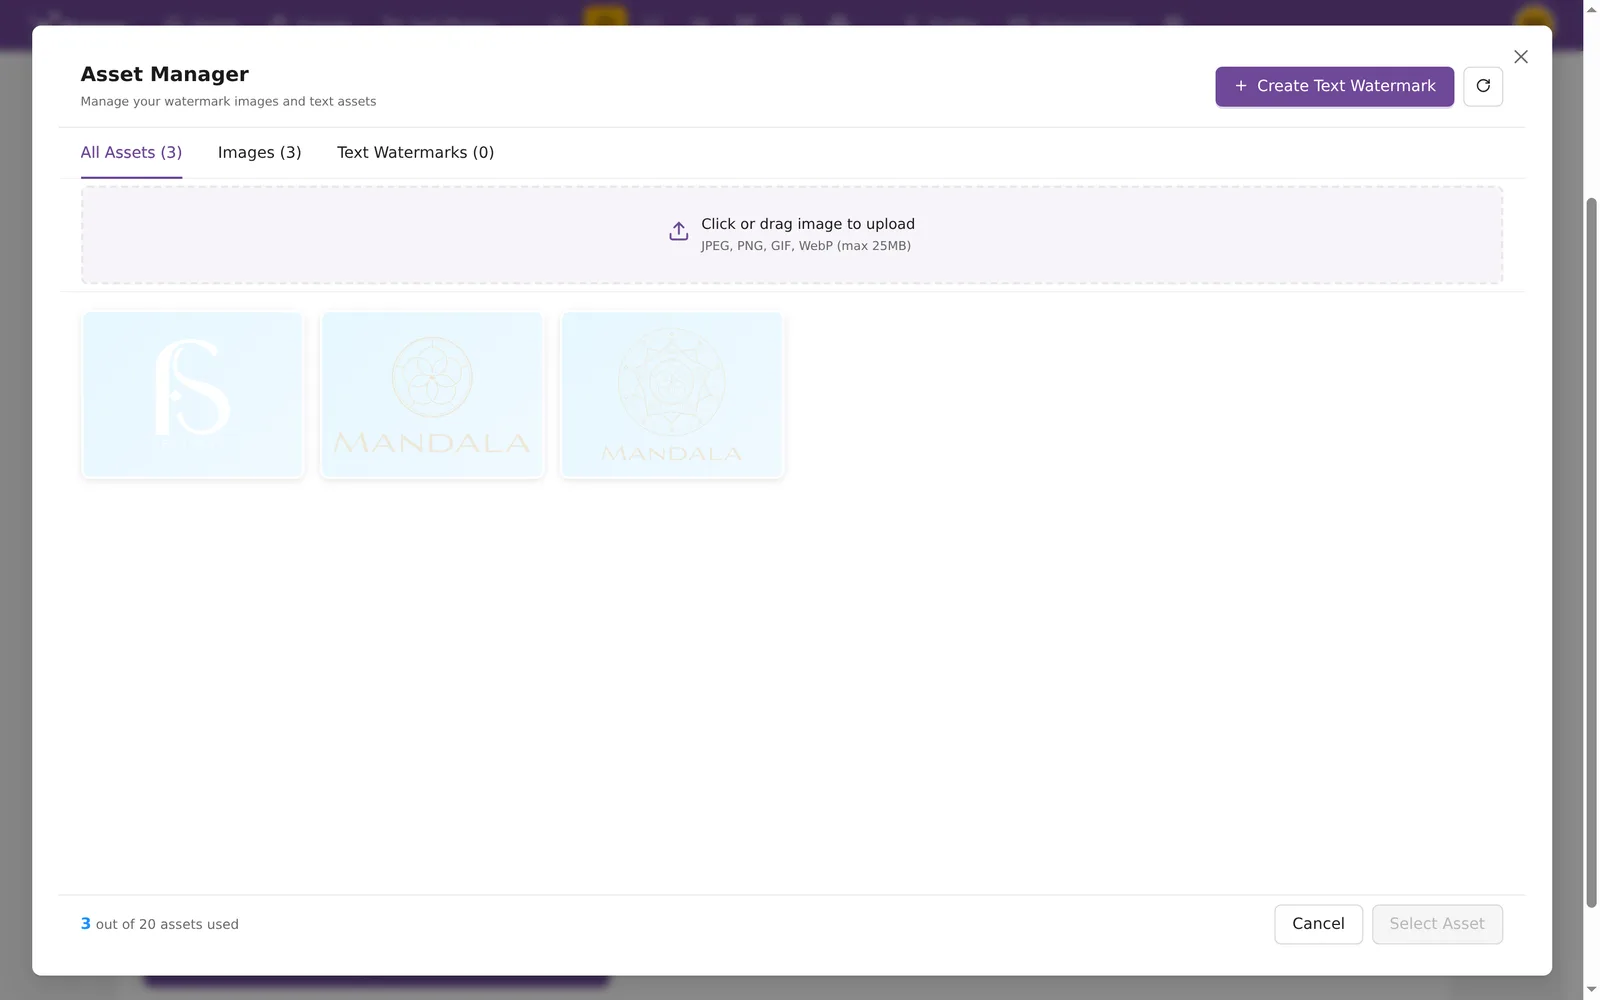
Click a logo, then click Select Asset.
Make a text watermark
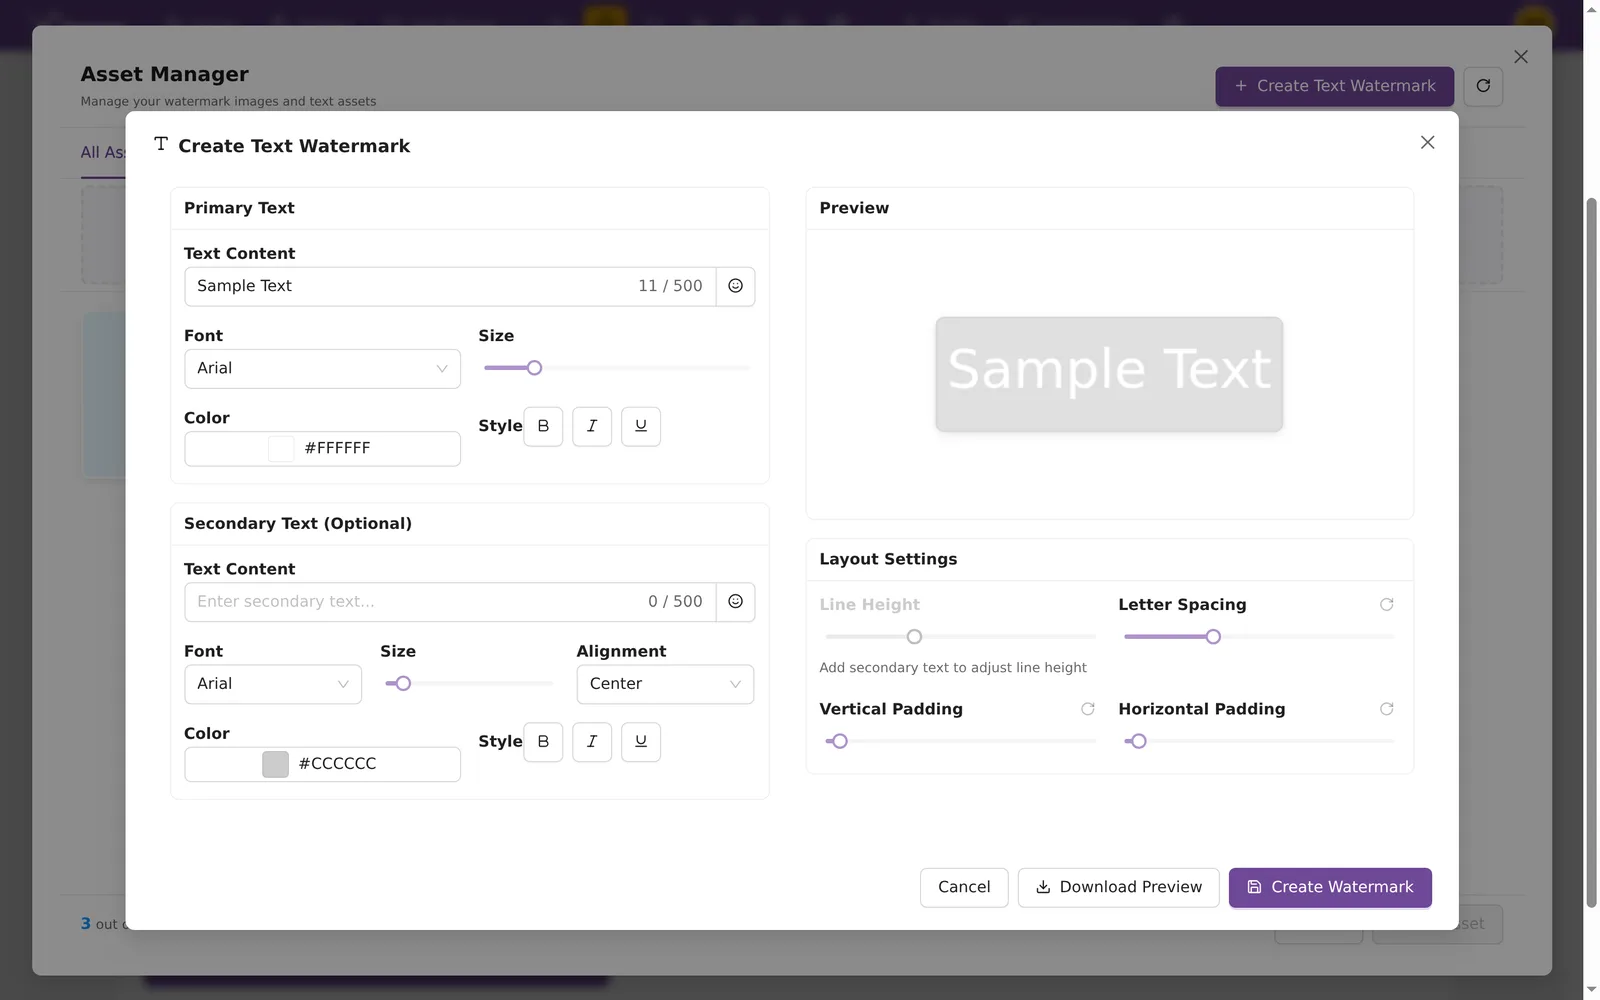
To use words instead of a logo, click + Create Text Watermark in the Asset Manager.
- Primary Text: your main line, with its font, size, colour, and bold, italic or underline.
- Secondary Text (Optional): a smaller second line, such as your website, with its own font, size, colour and alignment.
- Layout Settings: line height, letter spacing, and padding around the text.
Check the Preview, then click Create Watermark. The text is saved to your Asset Manager as an image, ready to select.
Give one event its own watermark
Your account watermark is used on every event. To use a different one on a single event, for example a client's logo:
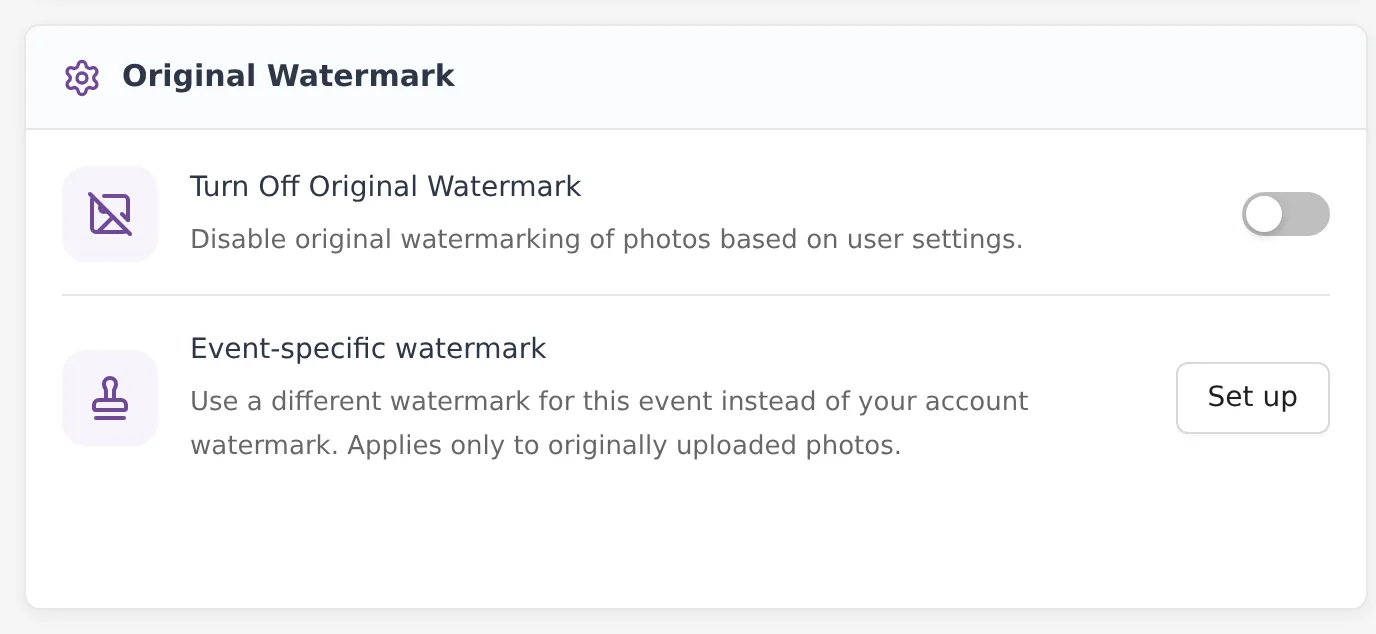
- Open the event and click the settings (gear) icon. See Event settings.
- In the Original Watermark card, click Set up next to Event-specific watermark.
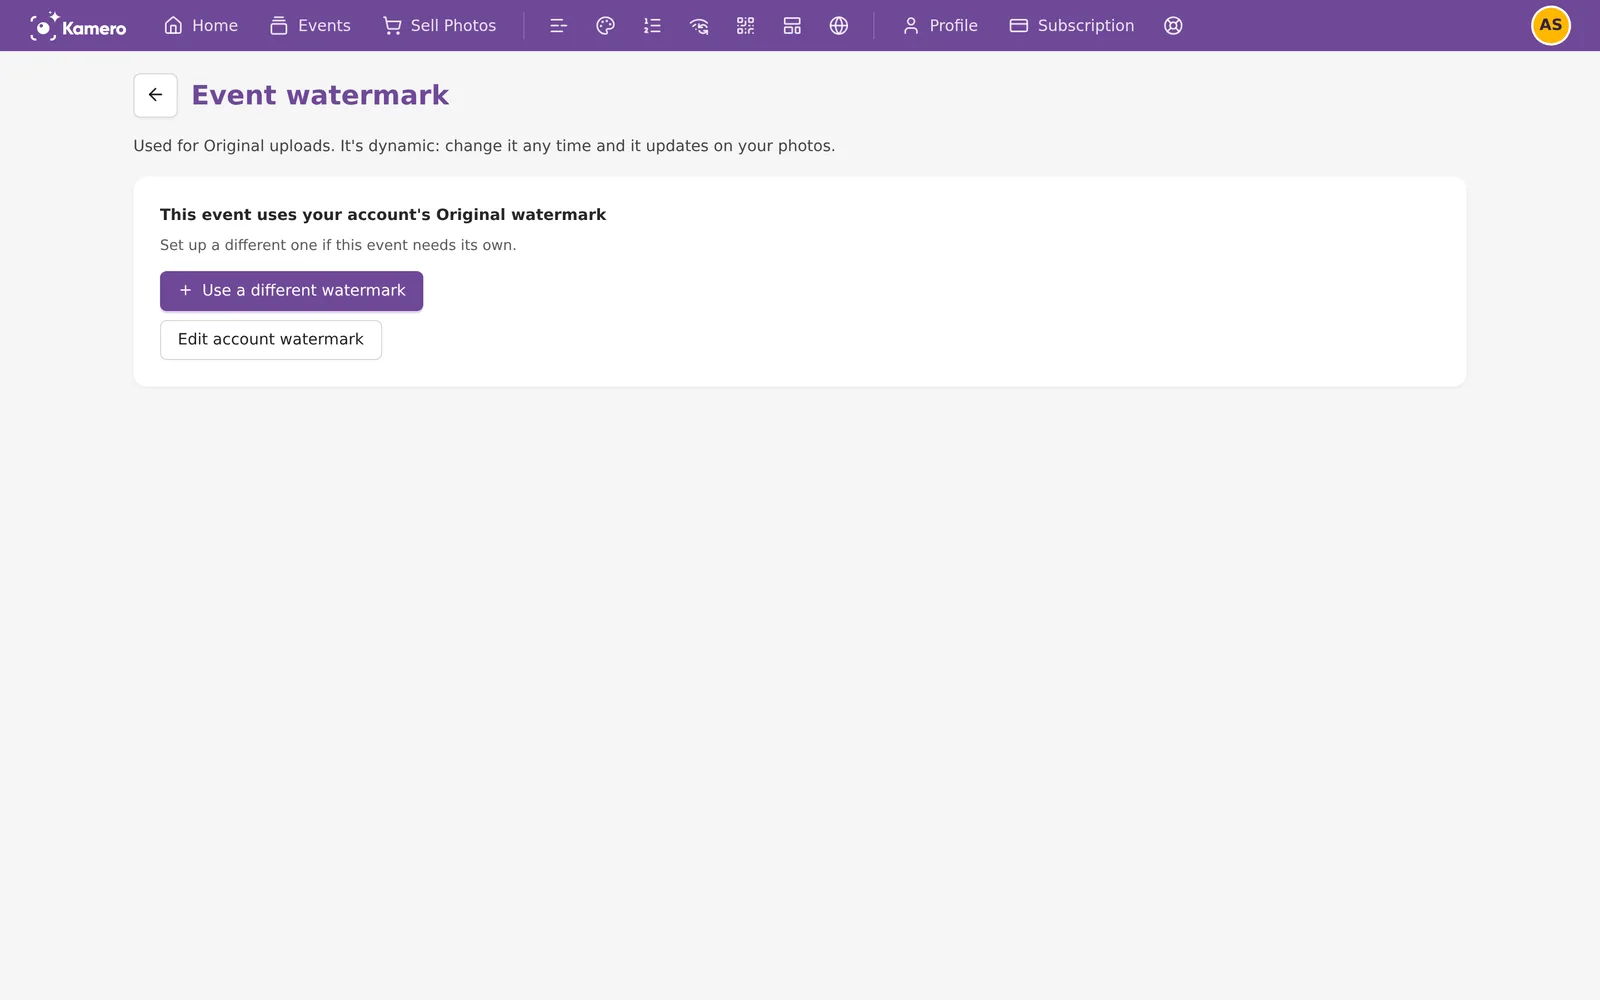
If the event has no watermark of its own yet, you see This event uses your account's Original watermark. Click + Use a different watermark to start one for this event, or Edit account watermark to change the one all your events use.
The event watermark has the same settings as the account one. The note at the bottom reads Applies only to this event's photos.
Turn the watermark off for one event
In the event's settings, turn on Turn Off Original Watermark. Original uploads in that event then show without a watermark. Turn it off again to bring the watermark back. Your photos are not changed either way.
What guests see
The preview says This is how your photos look to guests. Use the arrows or the thumbnails to check your watermark on 11 sample photos, or click View full screen.
Guests see the watermark on Original uploads in the event gallery, full screen, and on photos they download in normal size or share.

For how to upload originals, see Upload photos from the web dashboard.
Common problems
- No watermark on some photos. They were probably uploaded with Standard Upload, which uses the Standard watermark instead.
- My change doesn't show. Click Save first. If an event has its own watermark, changes to the account watermark don't affect it.
- No watermark on any photo in one event. Check whether Turn Off Original Watermark is on in that event's settings.
- The logo has a white box around it. Upload a PNG with a transparent background.
More Branding & watermarks tutorials
Try it in your dashboard
Sign in to Kamero and follow along. Questions? Raise a support ticket from the dashboard.