How to make one Common QR code for all your events
Every Kamero event has its own QR code. That works for a single wedding or school function. It gets tiring when you print a poster for your studio counter, a college notice board or a venue that hosts a new event every week. A Common QR solves this. You print one code once, and you choose where it points. When the next event starts, you point the same code at the new event. Nobody has to reprint anything.
This guide also covers the Follow All Your Events on App code on your Home page, which is a different kind of shared code.
Where to find Common QR
- On a computer: click the QR code icon in the top bar of the dashboard.
- On a phone: tap More in the bottom bar, then Common QR.
Common QR is included in every plan.
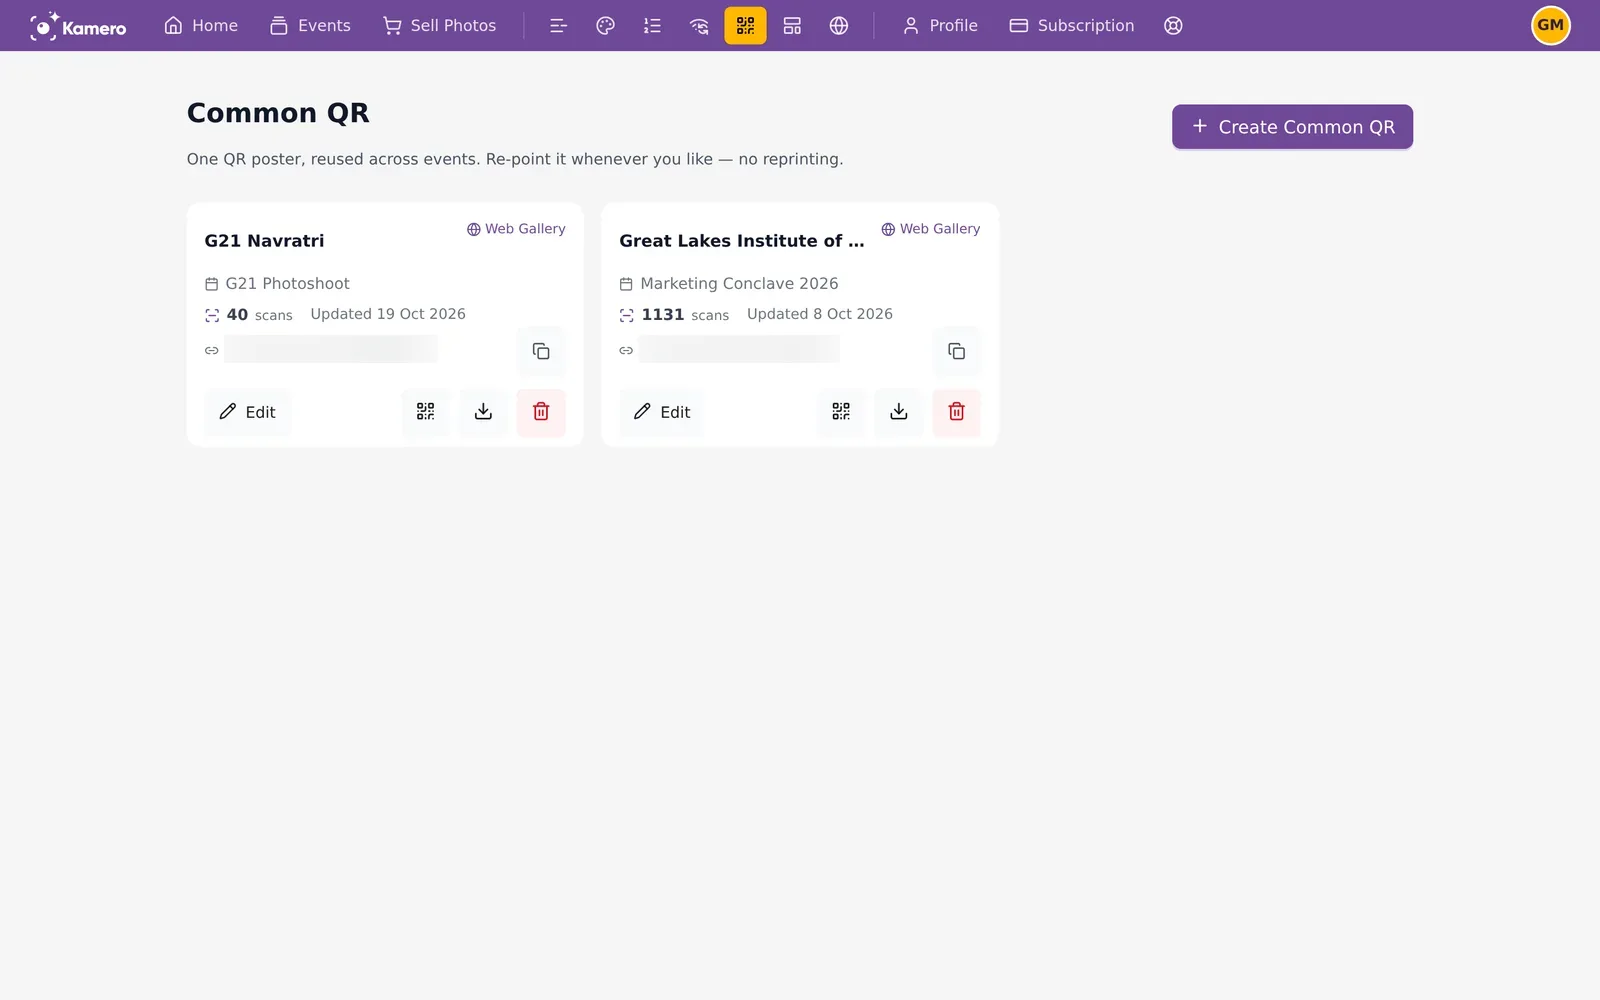
What a QR card shows
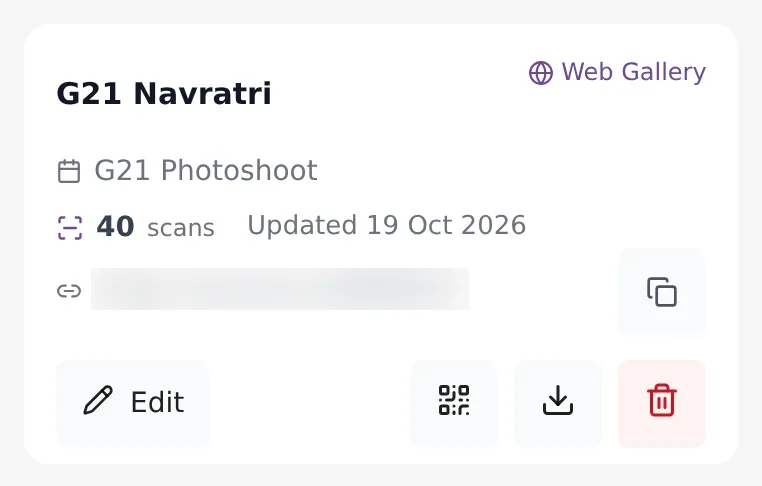
Each Common QR you make appears as a card with:
- The name you gave it.
- Where it points: a Web Gallery, an App Link or a Custom URL, and the event name.
- How many times it has been scanned.
- When you last changed it.
- Its short link on l.kamero.ai, with a copy button. You can share this link instead of the code.
The icons on the card let you Edit it, show the QR code on screen, download it, or delete it.
How to create a Common QR
Click Create Common QR. A short form opens with four steps.
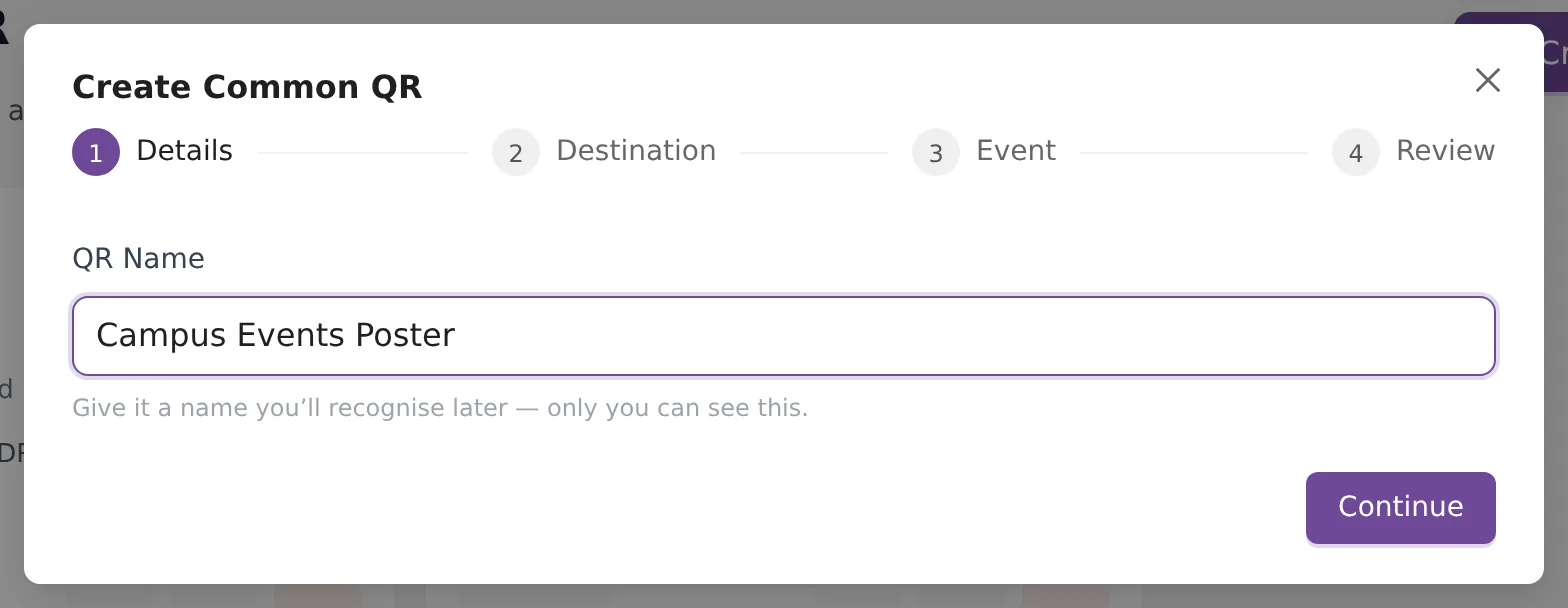
Step 1: Details
- Type a QR Name, such as "Campus Events Poster" or "Studio counter". Only you see this name. It can be up to 120 characters.
- Click Continue.
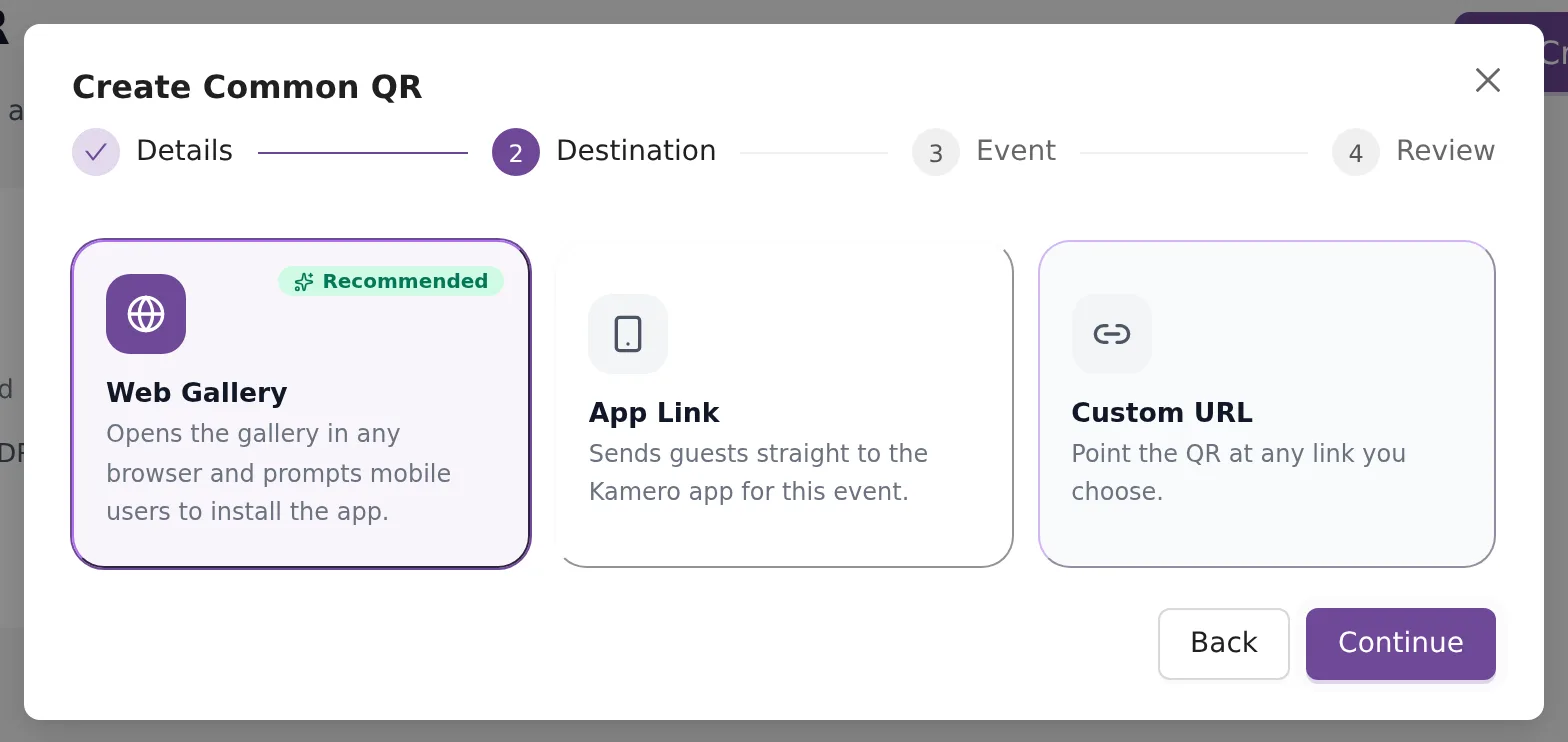
Step 2: Destination
Choose what happens when someone scans the code:
- Web Gallery (Recommended): opens the event in any browser. People on phones are also offered the app.
- App Link: opens the event straight in the Kamero app.
- Custom URL: opens any web address you type, such as your website or an admissions page.
Step 3: Event or Link
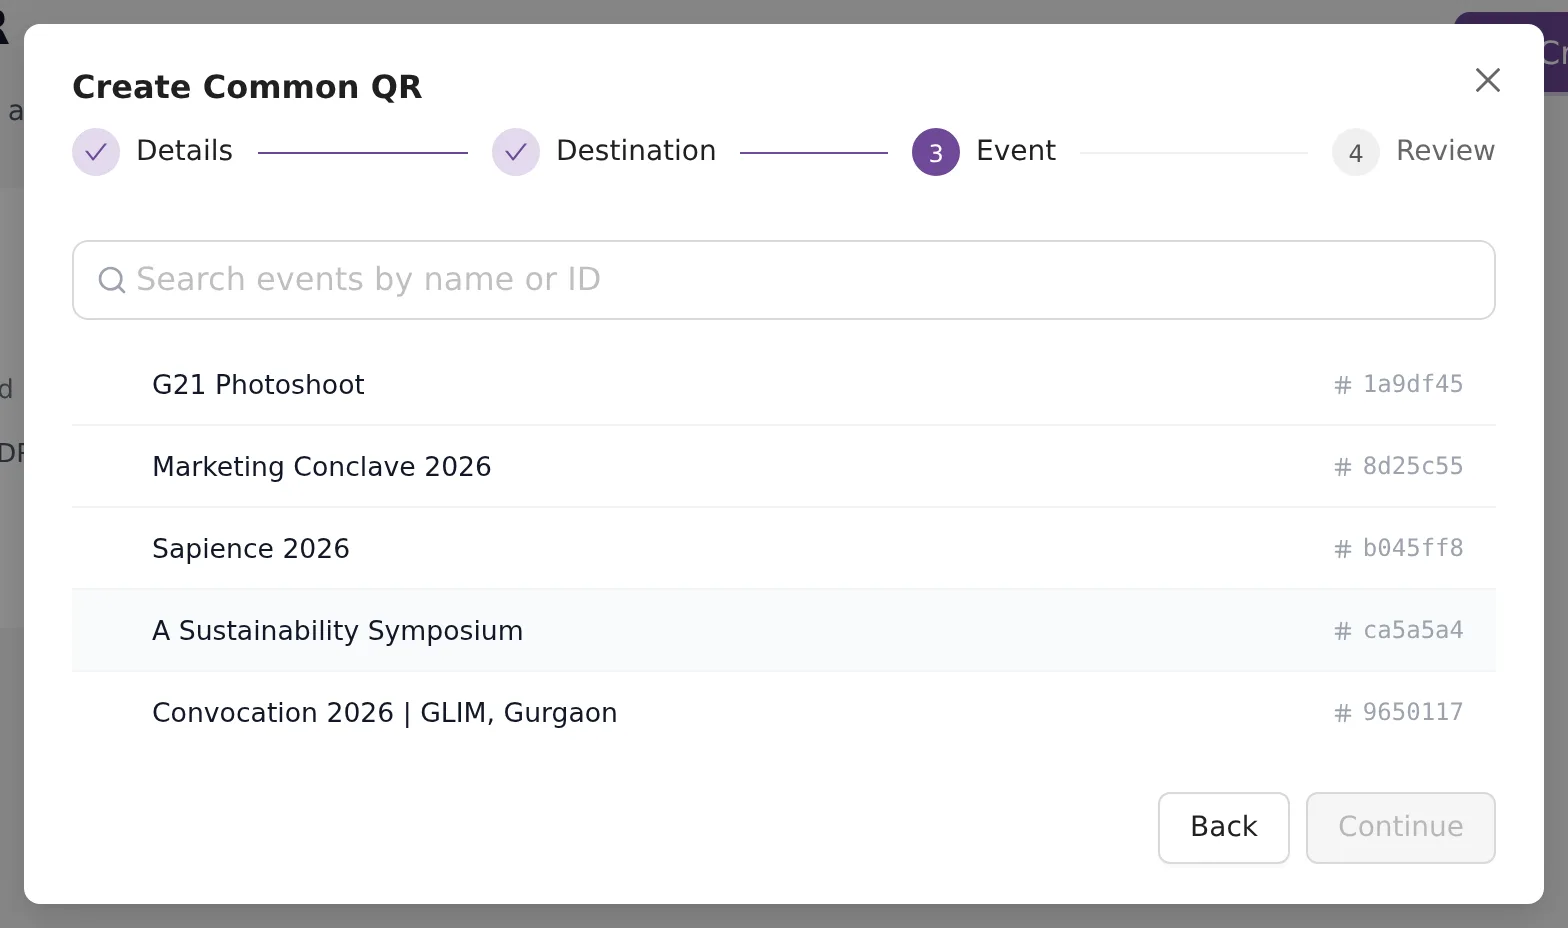
If you chose Web Gallery or App Link, pick the event. Type in Search events by name or ID, or scroll the list. The list shows 20 events at a time. Click Load more to see older ones.
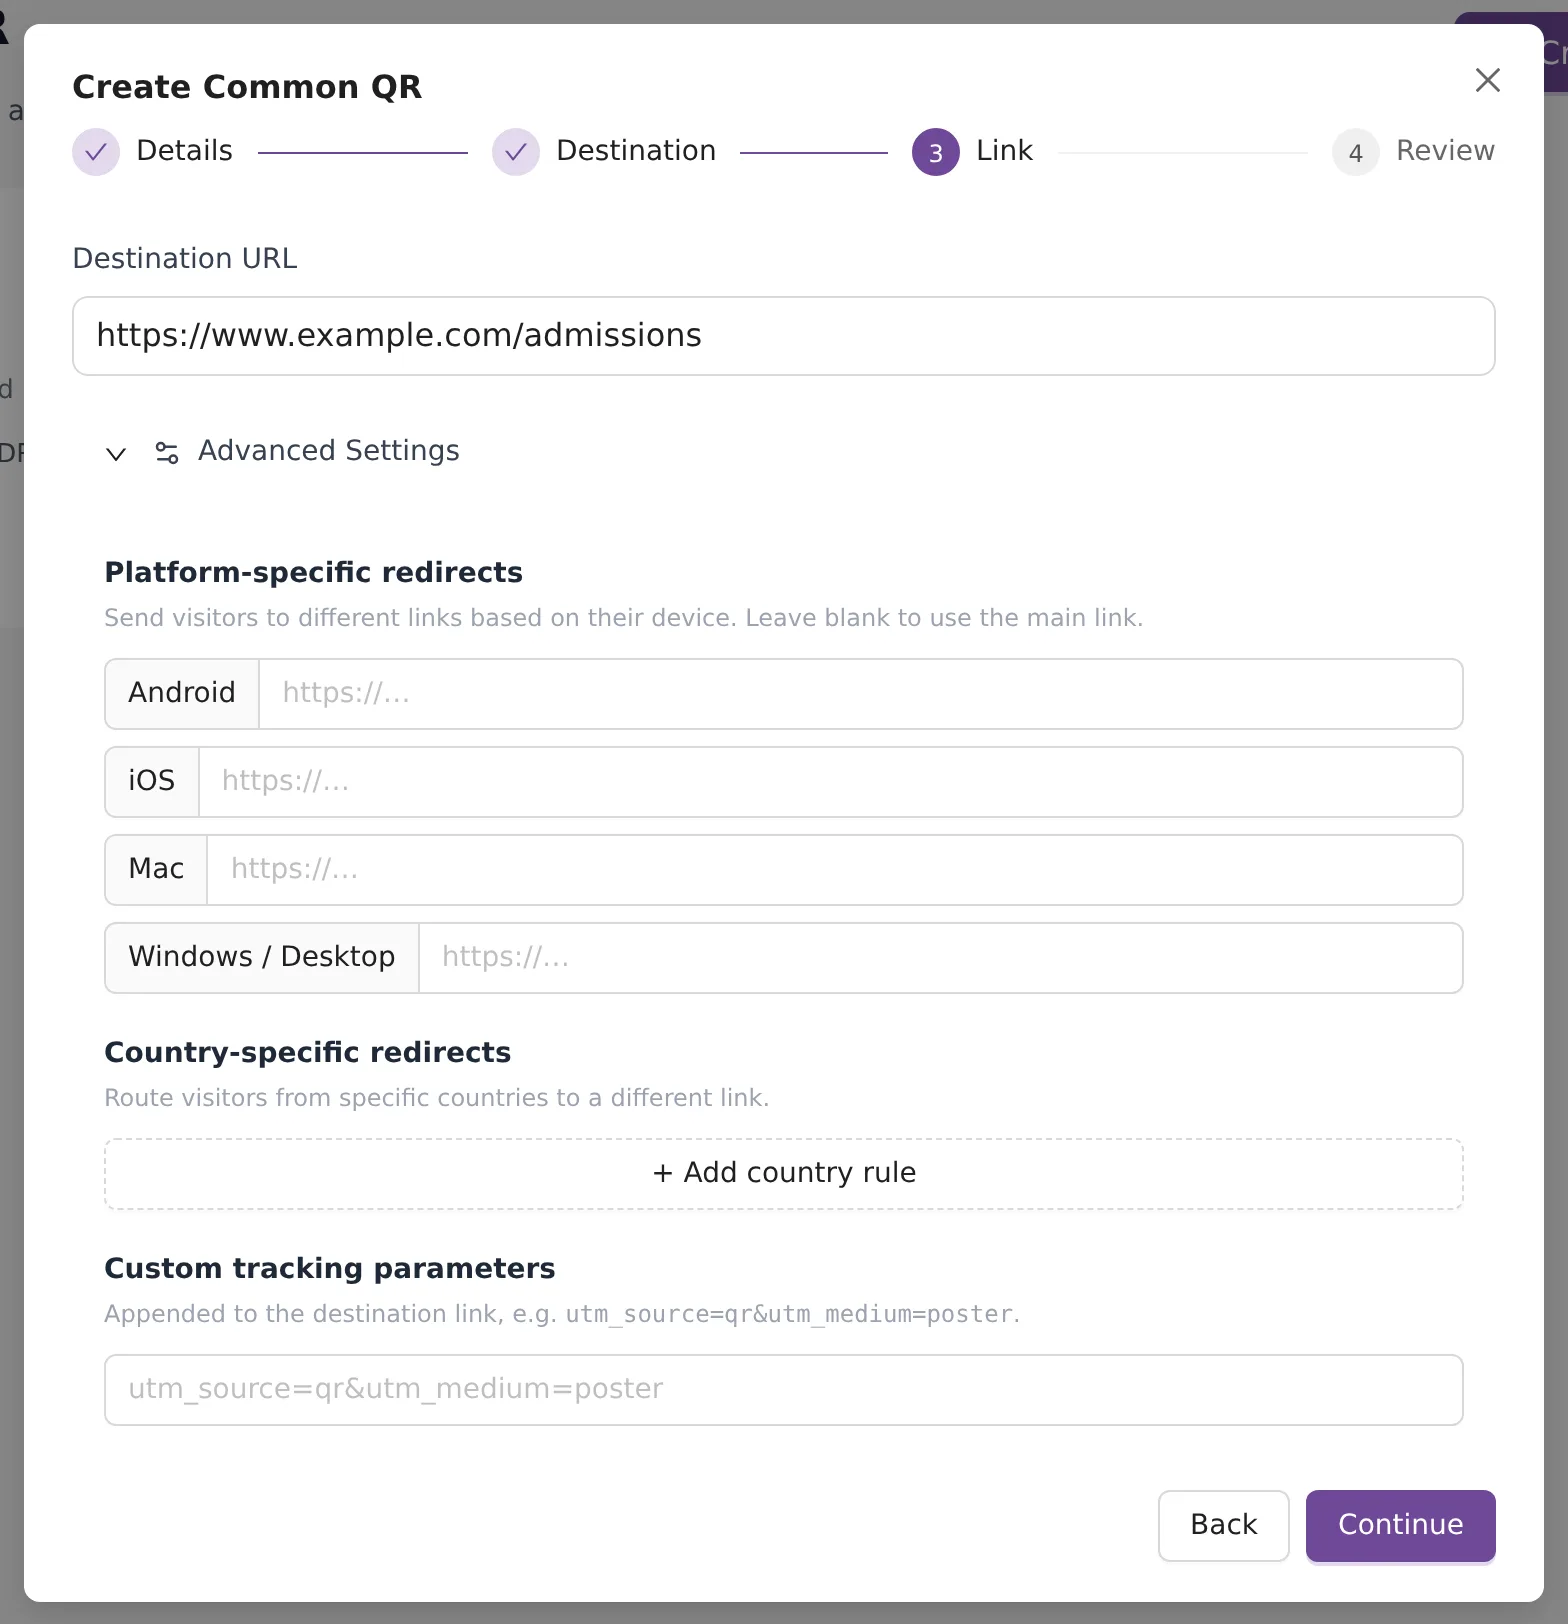
If you chose Custom URL, type the full address in Destination URL. Open Advanced Settings for extra options:
- Platform-specific redirects: send Android, iOS, Mac and Windows or desktop users to different addresses.
- Country-specific redirects: click + Add country rule to send people in one country to a different address.
- Custom tracking parameters: add tags such as utm_source=qr so your website analytics can tell poster visits apart.
Step 4: Review and design
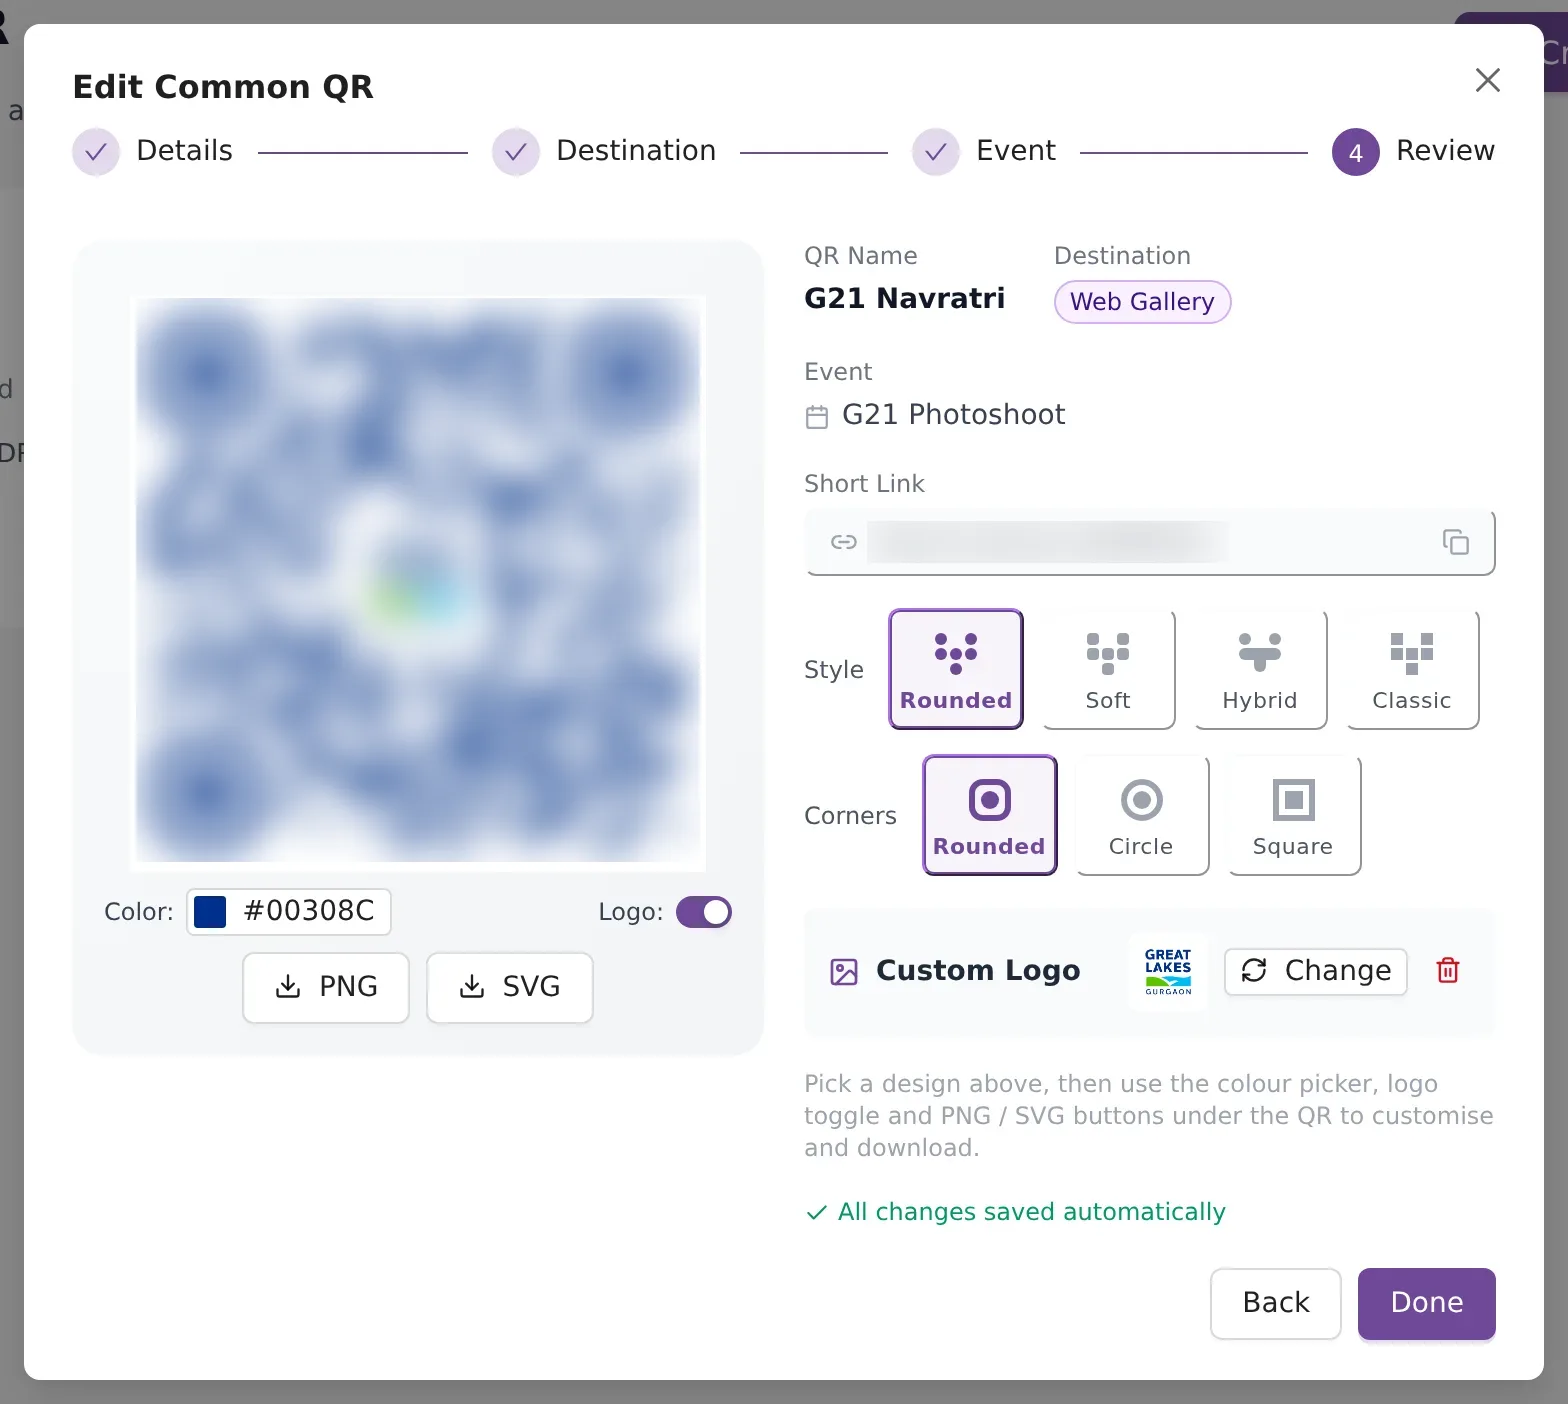
The QR is created as soon as you reach the Review step. From here on, every change saves by itself. You will see All changes saved automatically under the preview.
You can change how the code looks:
- Color: the colour of the code. Keep it dark on a light background so phones can read it.
- Logo: turn the logo in the middle on or off.
- Style: Rounded, Soft, Hybrid or Classic dots.
- Corners: Rounded, Circle or Square corner markers.
- PNG or SVG: the file type for download. PNG downloads at 4096 pixels, which is sharp enough for large posters. SVG downloads at 1024 pixels and can be scaled to any size by a printer or design app.
Add your own logo to the QR
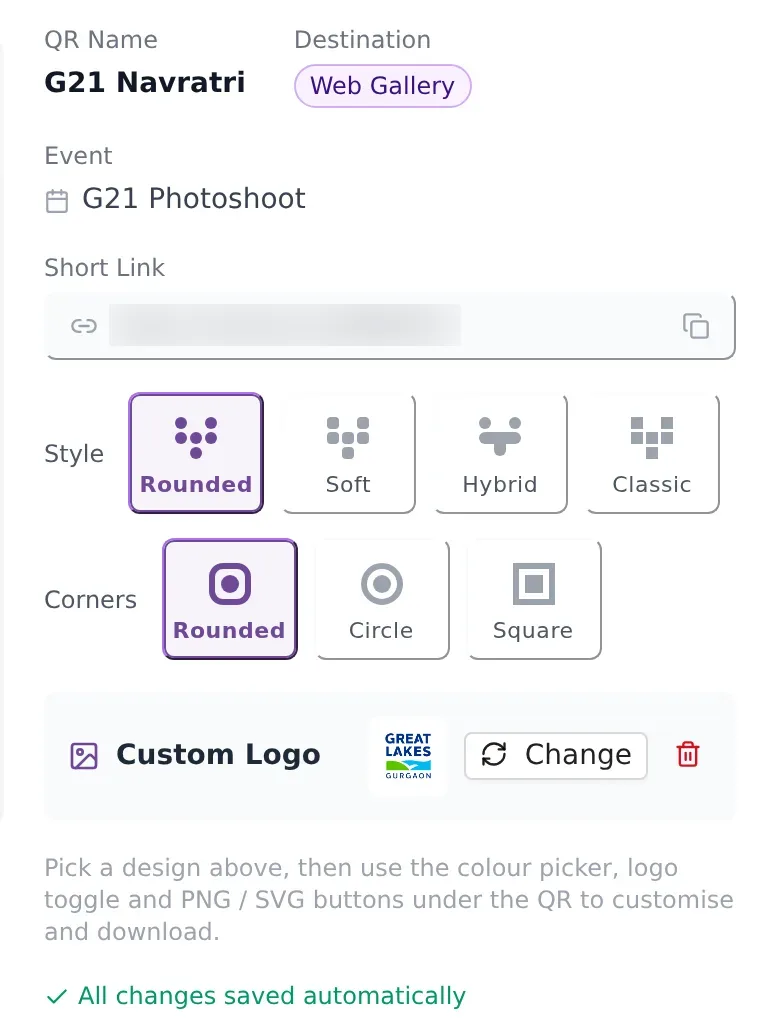
By default, the middle of the code shows the Kamero logo. To use your studio logo, find Custom Logo on the Review step and upload an image. The file must be 80 KB or smaller.
You have one QR logo for your whole account. It appears on all your Common QR codes. Click Change to replace it, or the delete icon to go back to the Kamero logo.
Download and print the QR
- On the Common QR page, click the download icon on the card. You get a 4096 pixel PNG.
- For an SVG, click Edit, go to the Review step, choose SVG and download from there.
- Put the file on your poster, standee or table card.
- Before you print many copies, scan a test print with your own phone.
To show the code on screen, for example on a laptop at a reception desk, click the QR icon on the card.
Point the QR at a new event
When a new event starts, click Edit on the card. Move to the event step, pick the new event, and continue to Review. The printed code now opens the new event.
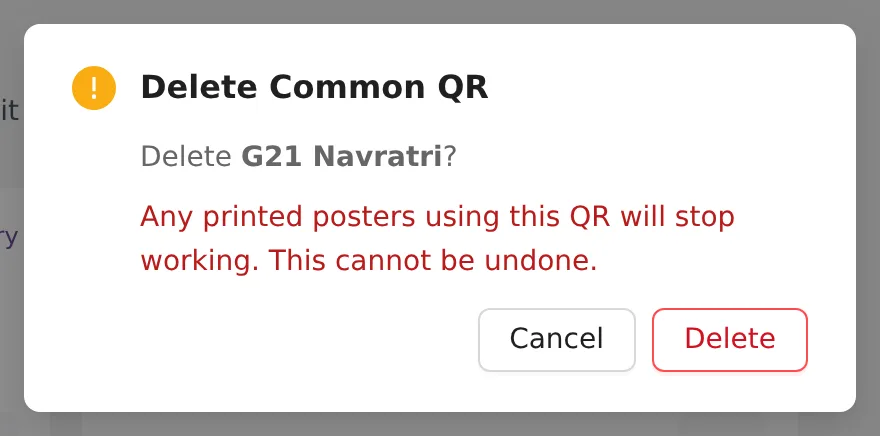
Delete a Common QR
Click the delete icon on the card, then Delete. Any poster with this code stops working, and this cannot be undone. If you only want a different event, edit the QR instead.
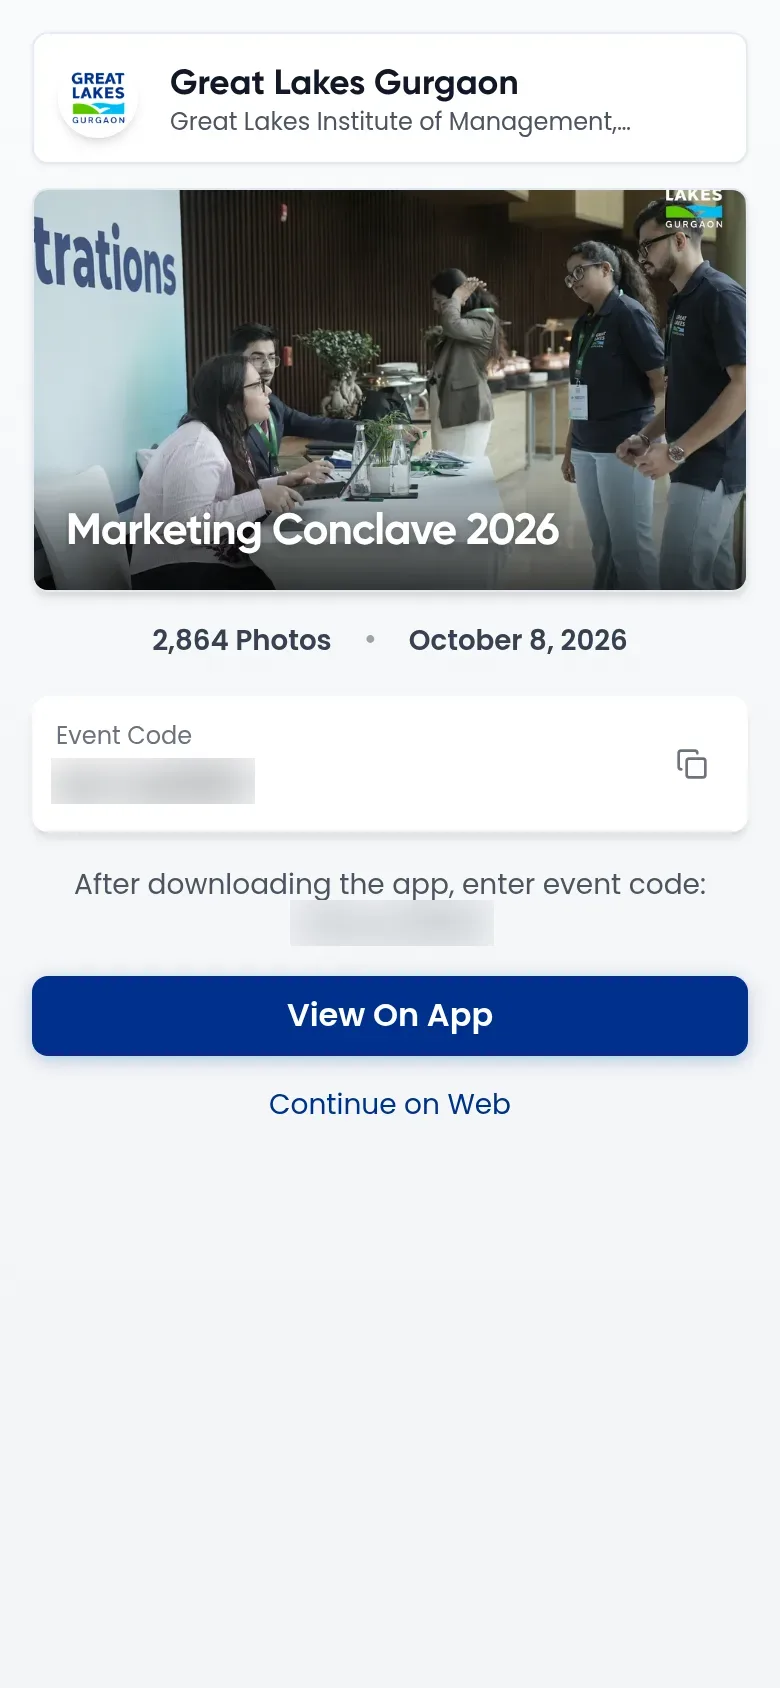
What guests see when they scan
With Web Gallery, a guest who scans the code on a phone sees:
- Your studio logo and name at the top.
- The event cover with the event name, number of photos and date.
- The event code, with a note to enter it after installing the app.
- View On App to open or install the app, and Continue on Web to see the photos in the browser.
With App Link, the guest goes straight to the event in the Kamero app. With Custom URL, they go to the address you set. To change how the gallery looks, see event branding.
Follow All Your Events on App
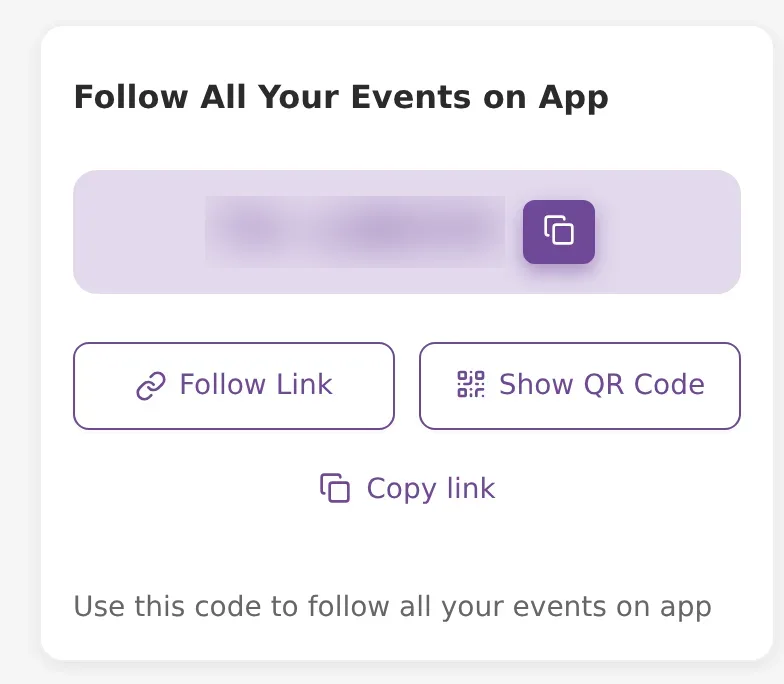
Your Home page has a card called Follow All Your Events on App. It holds a code that starts with FA-, such as FA-ABC123. This code is not tied to one event, and it works only in the app. A guest who scans it, opens its link or types it in the app follows all your current events. In a phone browser the link just sends the guest to the app store. Events you create later do not appear on their own: the guest taps refresh on the Events tab in the app, or scans the code again. It suits regular clients, a school or a college that has many events with you. Send your guests this guide to following your events in the app.
The card has:
- The FA- code with a copy button.
- Follow Link: opens the follow link. The copy button next to it copies the link to send on WhatsApp or email.
- Show QR Code: opens a QR code for the follow link.
If you have your own branded app, the link opens your app instead of the Kamero app. See app features for more on the guest app.
The follow QR code
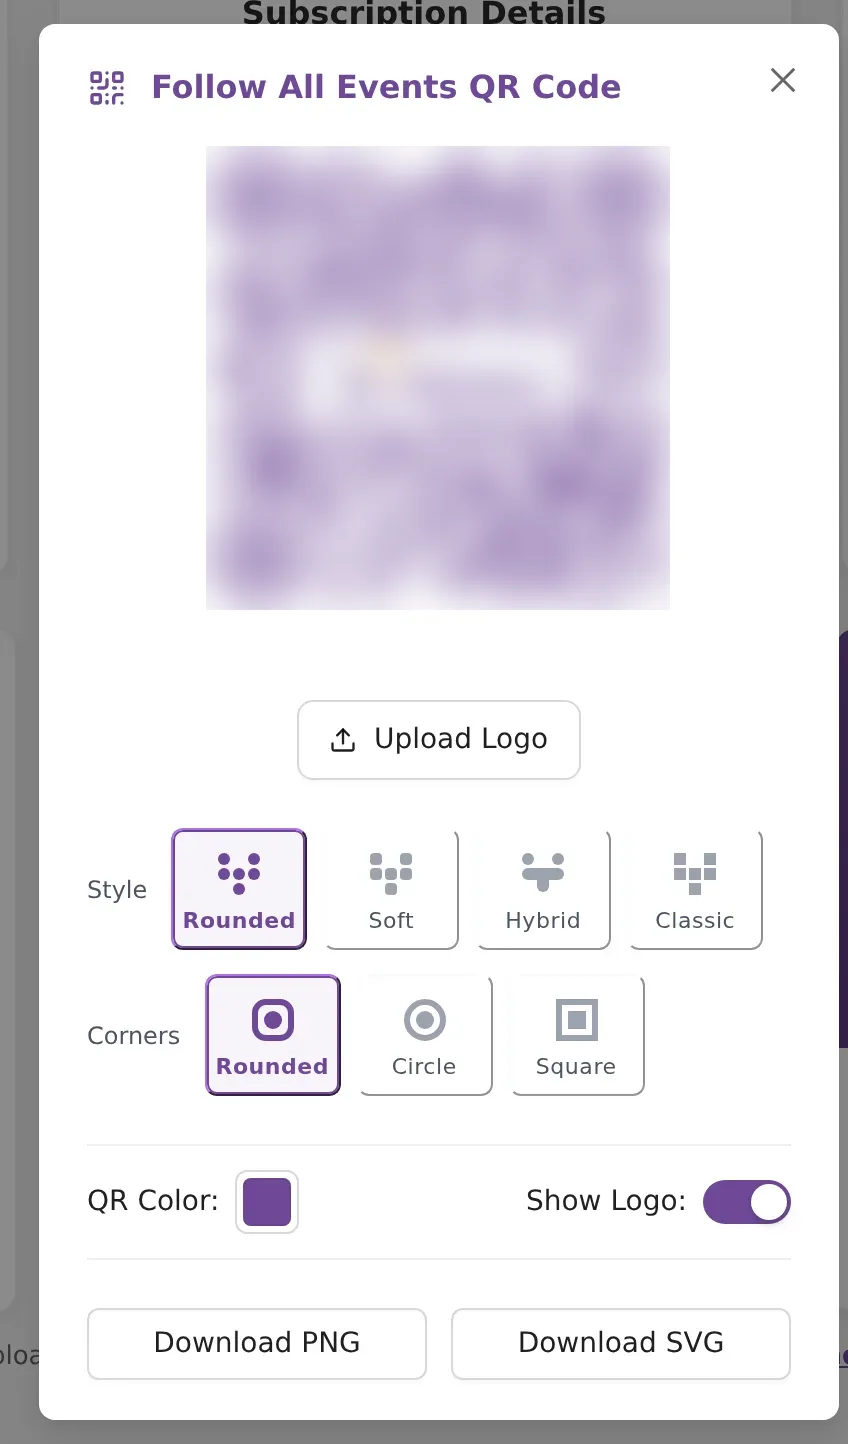
Click Show QR Code to open Follow All Events QR Code. You can pick a Style, Corners and QR Color, and turn Show Logo on or off. Upload Logo puts your logo in the middle (80 KB or smaller). This logo is used only for this download and is not saved, so upload it again next time. Then click Download PNG (4096 pixels) or Download SVG (1024 pixels).
Common problems
- Phones do not read the code: use a dark colour on a white background, print it at least 3 cm wide, and leave a white border around it.
- The poster opens an old event: click Edit on the card and pick the current event.
- The logo will not upload: make the file 80 KB or smaller.
If something else goes wrong, raise a ticket. See support tickets.
Frequently asked questions
If I change where a Common QR points, do I need to print it again?
No. The printed code stays the same. Click Edit on the QR card, pick a new event or link, and the next person who scans the poster lands on the new place.
Does Common QR cost extra?
No. Common QR is part of every Kamero plan. There is no charge to create, edit or download one.
Should I pick Web Gallery or App Link?
Pick Web Gallery in most cases. It opens in any phone or computer browser and also offers the app to phone users. App Link sends people straight to the Kamero app, so it suits guests who already have the app or are happy to install it.
Why does my logo not upload?
The logo must be 80 KB or smaller. Save it as a smaller PNG or JPG and try again. A square logo with a plain background looks best in the middle of the code.
What happens to printed posters if I delete a Common QR?
They stop working. Anyone who scans them will not reach your event. If you only want to show a different event, edit the QR instead of deleting it.
What is the difference between a Common QR and the Follow All Your Events code?
A Common QR opens one event or link that you choose, and you can change it. The Follow All Your Events code on Home works only in the Kamero app or your branded app. It makes guests follow all your current events. Events you create later appear when the guest taps refresh on the Events tab in the app, or scans the code again.
More Sharing & website tutorials
Try it in your dashboard
Sign in to Kamero and follow along. Questions? Raise a support ticket from the dashboard.