Organise an Event: Albums, Highlights and Photos
Each Kamero event holds its photos in albums. Guests see the albums in the order you set, so a wedding can have Haldi, Mehendi and Reception, and a conference can have Day 1, Day 2 and Stage. This page covers everything you do on the event page after the photos are in: albums, the Highlight and Guest Uploads albums, selecting, moving, downloading and deleting photos, the photo viewer, the sort order, and pages.
You need an event first. See create an event, and upload photos from the web dashboard to fill it.
The event page at a glance
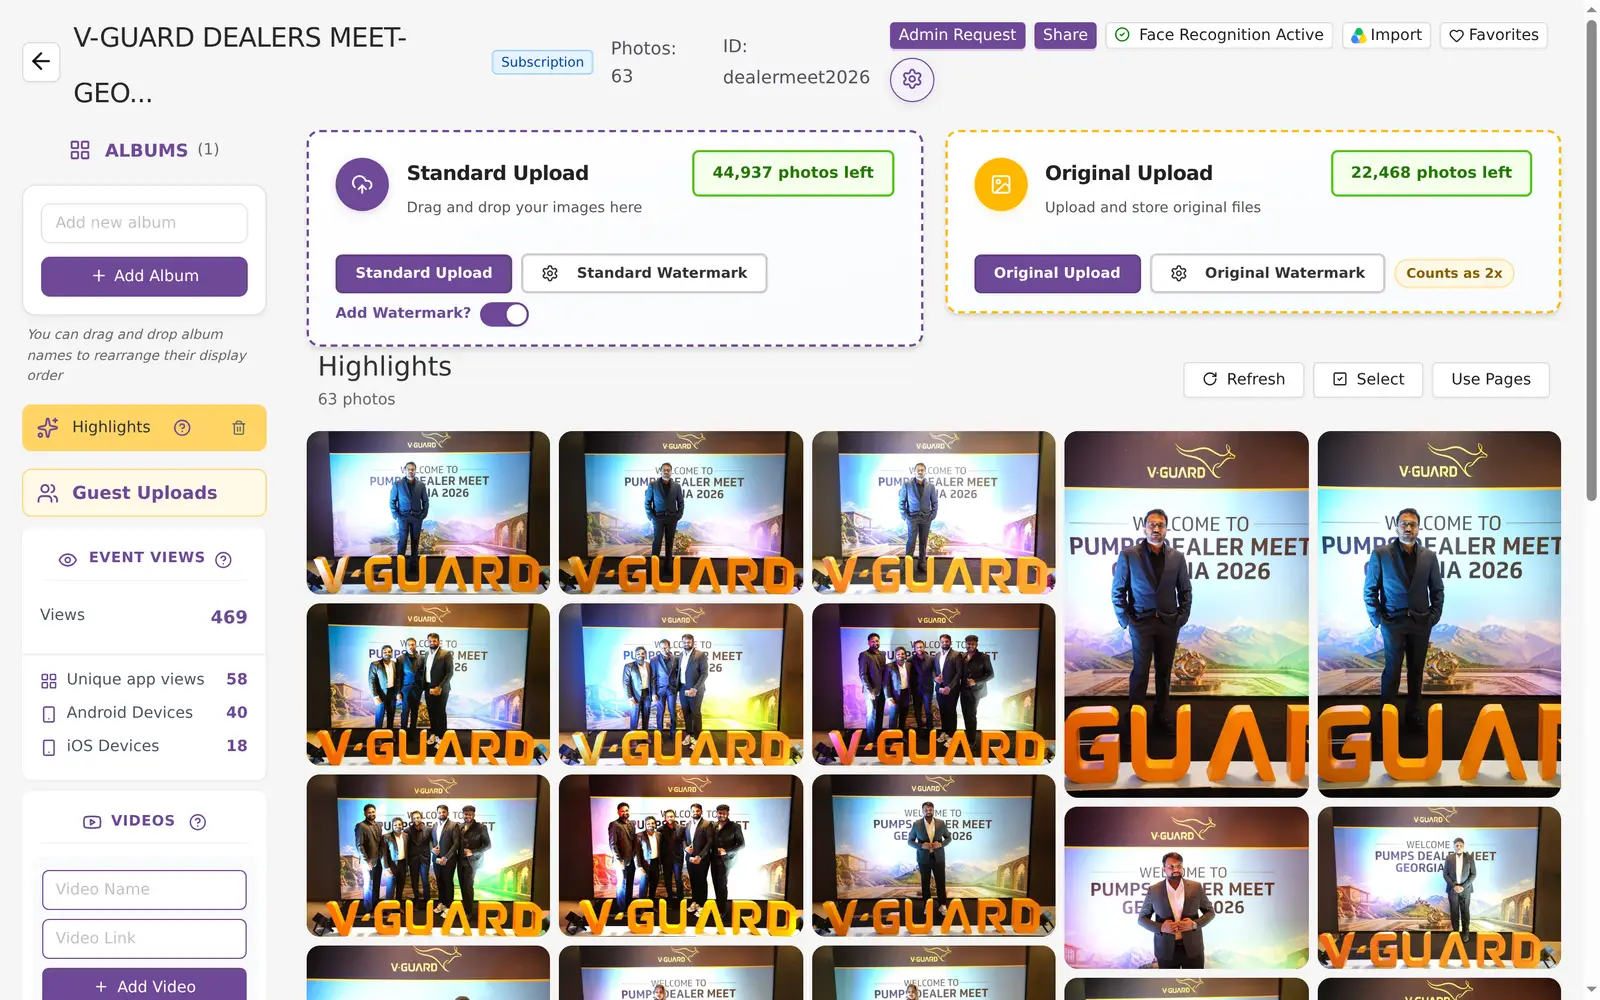
Sign in to your Kamero dashboard, click Events and open an event. On a computer the page has three parts:
- The top bar: the event name, the photo count and the event ID, with buttons such as Admin Request, Share, Import, Favorites and the settings gear.
- The left column: the ALBUMS list, then the EVENT VIEWS, VIDEOS, SORT PHOTOS BY and FAVORITES cards.
- The main area: the Standard Upload and Original Upload panels, and the photos of the album you picked.
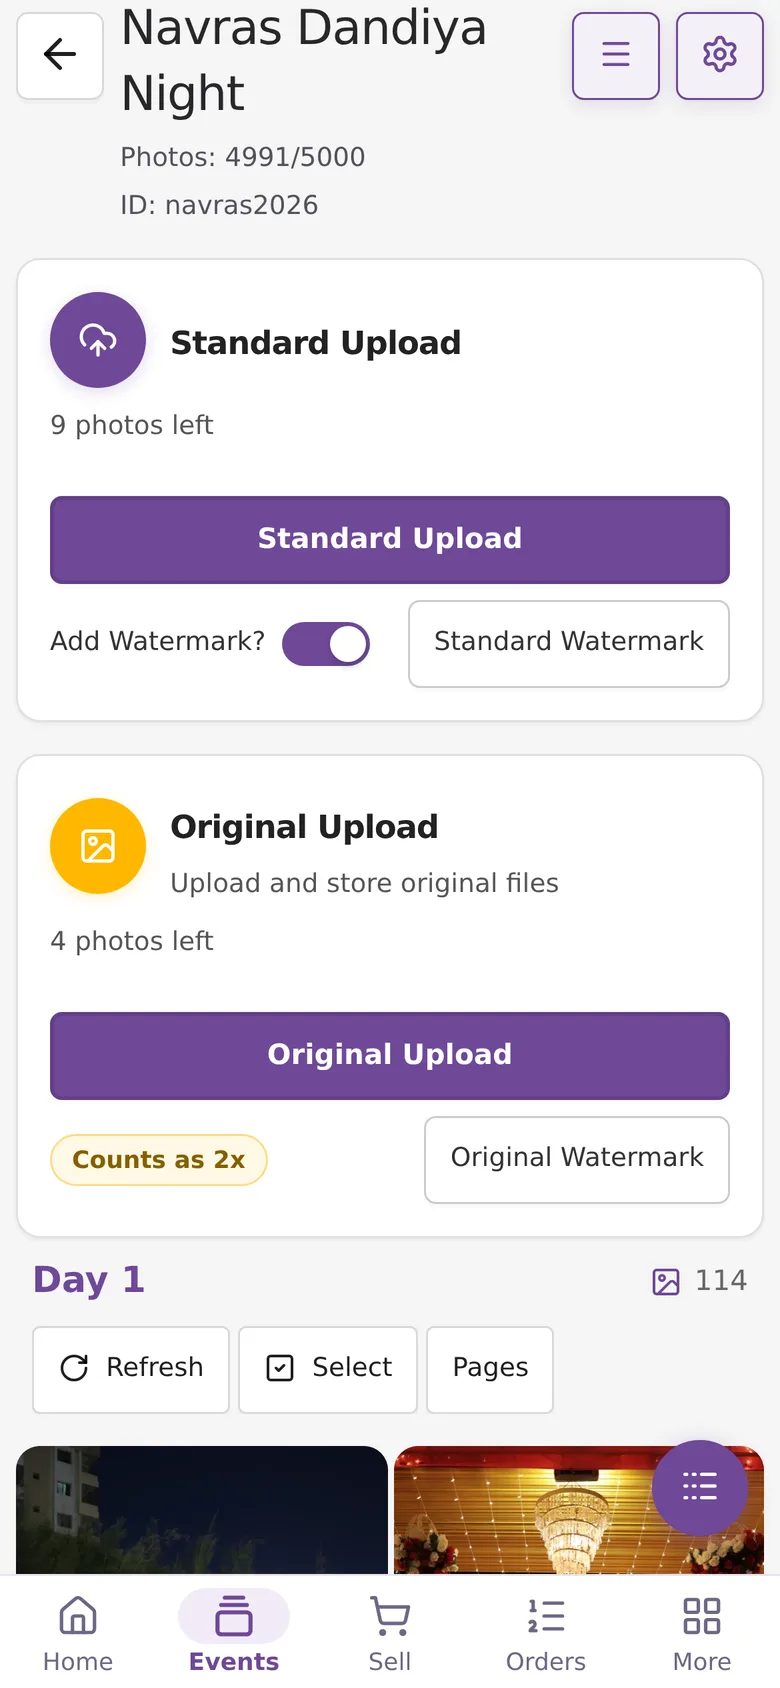
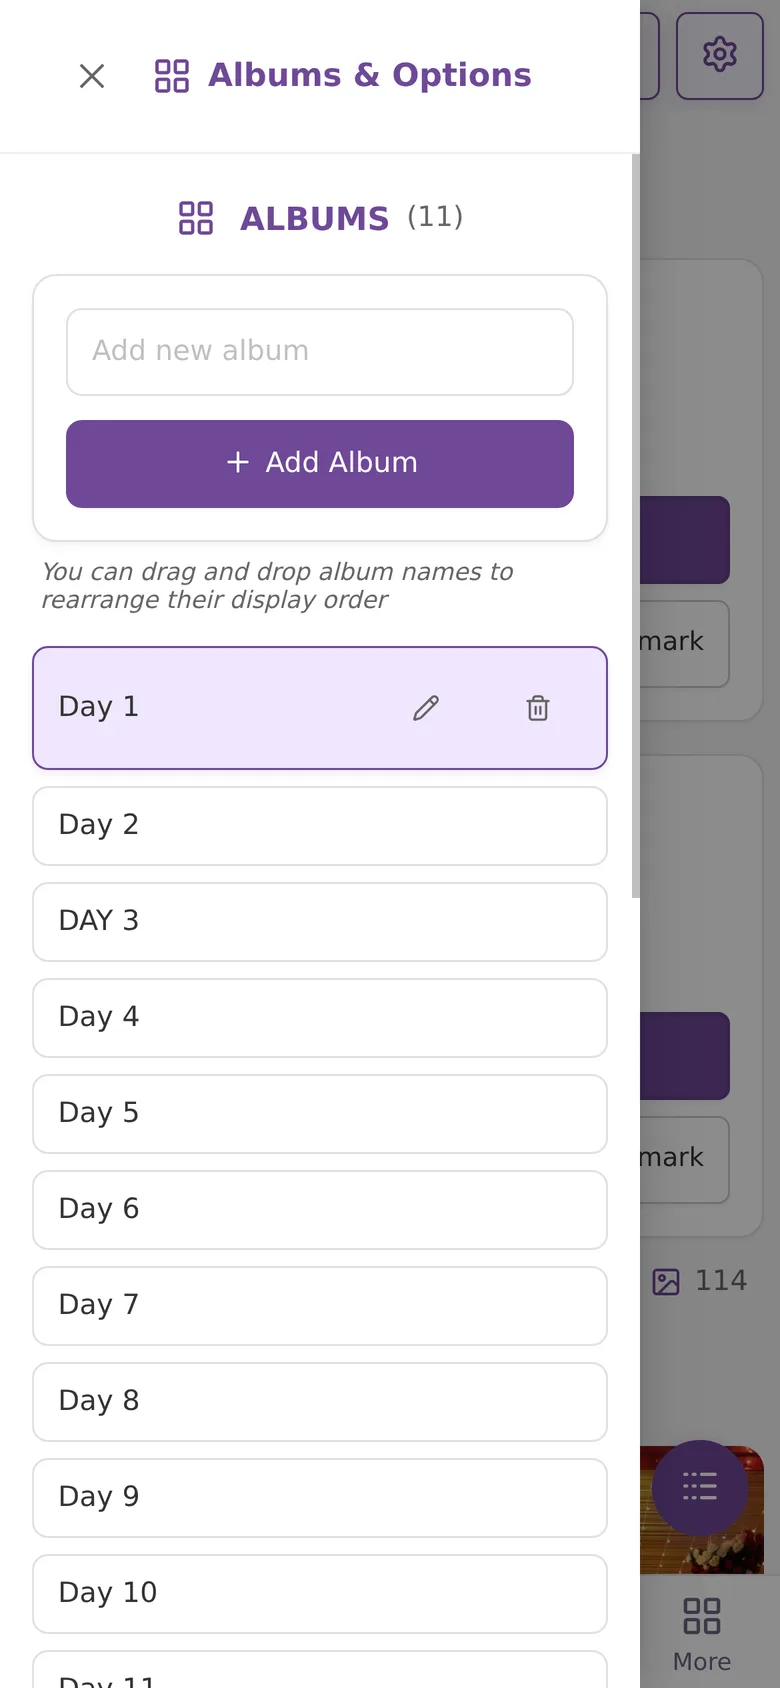
On a phone the left column and the top bar buttons move into two drawers. Tap the round purple button at the bottom right to open Albums & Options, which holds the album list and the cards. Tap the menu button next to the settings gear at the top to open Actions, which holds Admin Request, Share, Import from Google Drive, Increase Photo Limit and Guests Data.
Add, rename, reorder and delete albums
Add an album
- Type a name in the Add new album box. Names can be up to 20 characters.
- Click Add Album.
A new event with no albums shows No Albums with the same box and an Add button.
Change the order
Drag an album name up or down the list. Guests see the albums in this order in the app and the web gallery.
Rename an album
- Click the album. A pencil icon and a bin icon appear on it.
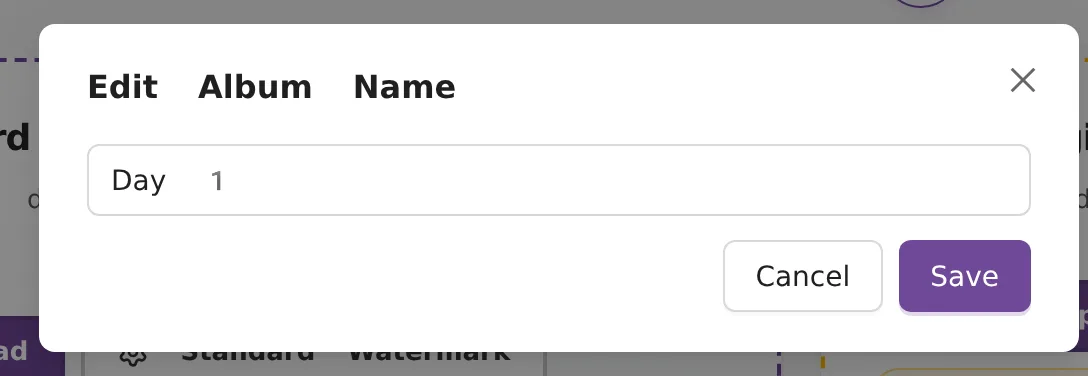
- Click the pencil. The Edit Album Name dialog opens.
- Type the new name and click Save.
Delete an album
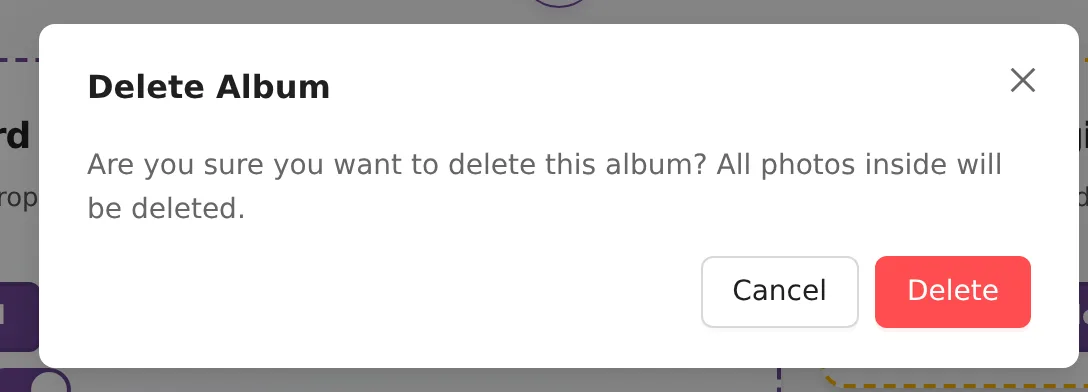
Click the album, then the bin icon. The Delete Album dialog warns you: "All photos inside will be deleted." Click Delete only if you want the photos gone too. To keep them, move them to another album first (see below).
The Kam-Sync album
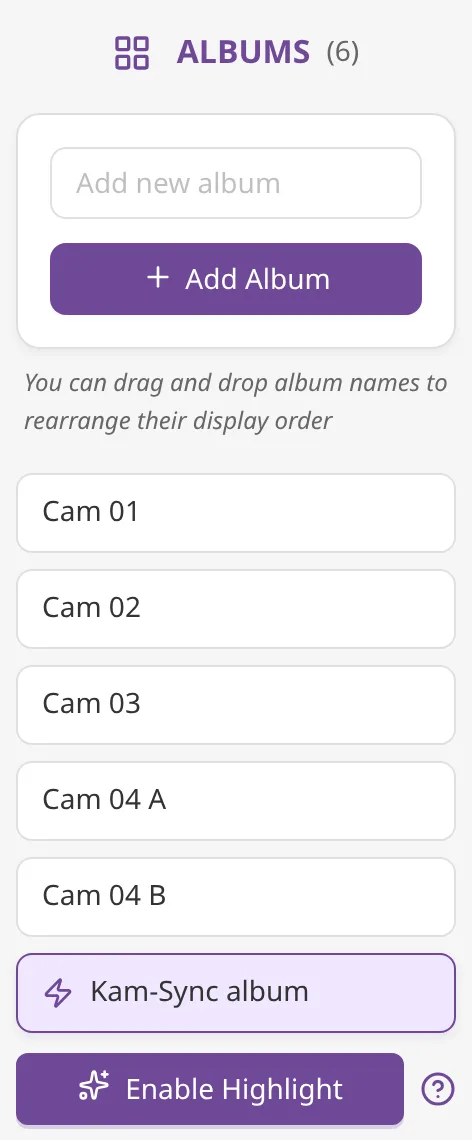
If you send photos from your camera with Kam-Sync, the event gets a Kam-Sync album with a lightning icon. It has no pencil or bin icon, so you cannot rename or delete it. You can still move its photos to other albums. See Kam-Sync: camera to cloud.
The Highlight album
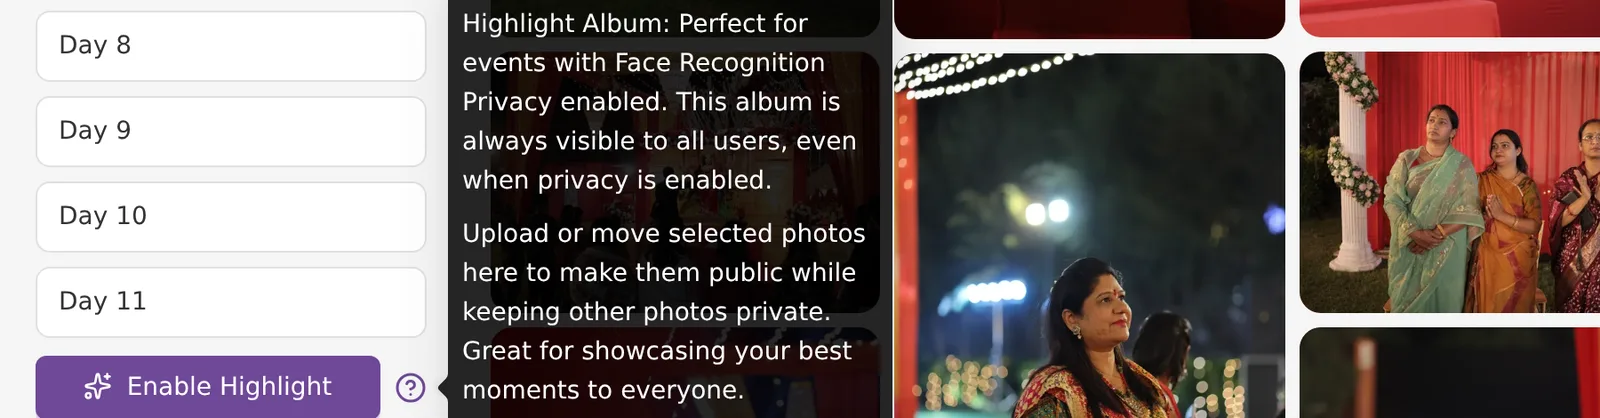
The Highlight album is for events where face recognition privacy is on, so each guest sees only the photos they are in. Photos in the Highlight album are shown to every guest anyway. Put group photos, stage shots and the couple's portraits there.
- Click Enable Highlight under the album list. The question mark next to it explains the album.
- A Highlights album appears at the top of the list, and the message "Highlight album enabled successfully" shows.
- Upload photos into it, or move selected photos into it from other albums.
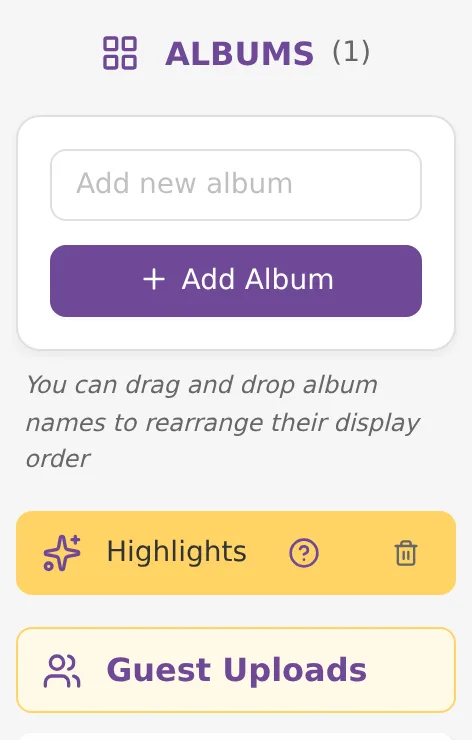
The Highlights album always stays first. You cannot drag it or rename it. It has a bin icon only, and there is no switch to turn it off. Deleting it deletes the photos inside it, so move any photos you want to keep before you delete it.
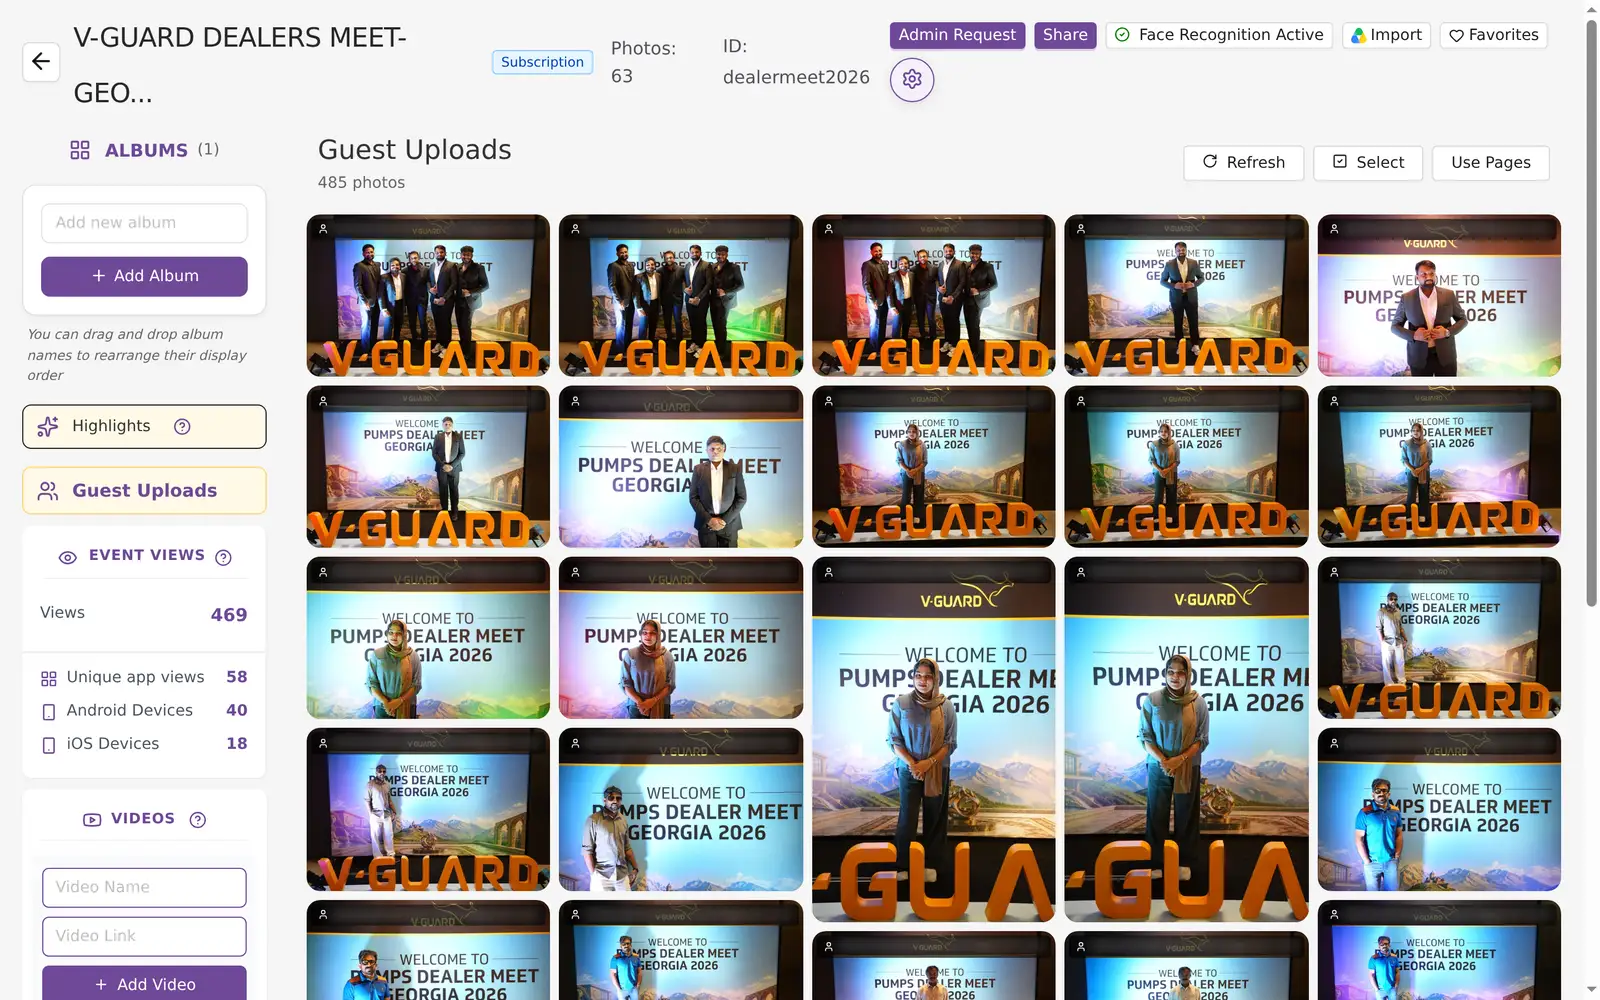
The Guest Uploads album
When you turn on guest uploads in event settings, a Guest Uploads album with a people icon appears in the list. It holds every photo guests upload. The album stays in the list while it has guest photos, even after you turn guest uploads off.
- Each photo shows the email of the guest who uploaded it. The photo viewer shows it as Uploaded by.
- There is no approval step. Guest photos are visible to the event as soon as they are uploaded. Delete the ones you do not want.
- You can select, download and delete photos here.
- You cannot upload into this album, move photos out of it with Move to.., or set one of its photos as the album cover.
Select photos
- Open an album and click Select. The button changes to Cancel.
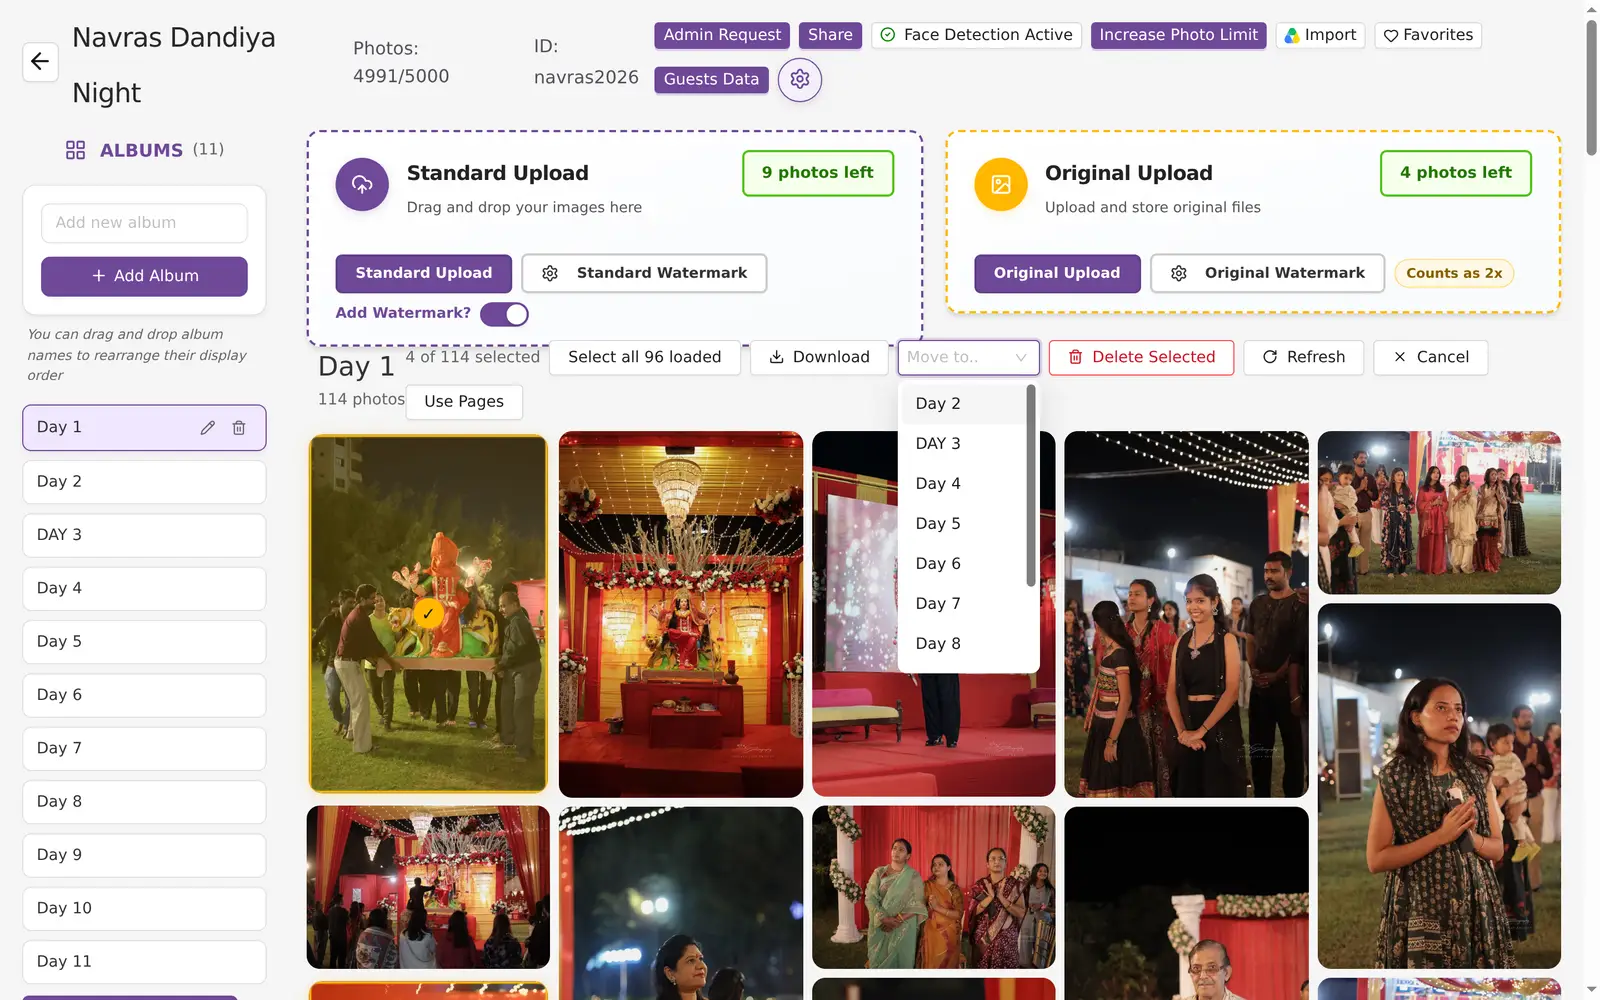
- Click the photos you want. A tick appears on each one and a counter shows, for example 4 of 114 selected.
- To pick many at once, click Select all. Click Deselect All to clear the selection.
Select all selects only the photos that have loaded so far. When the album has more photos than are loaded, the button says so, for example Select all 96 loaded. To select more, scroll down until more photos load, or use pages with a bigger page size (see below).
Download selected photos
Select the photos and click Download. Each photo saves as its own file, one after the other. There is no zip, so your browser may ask once whether the site can download several files. Allow it.
If any selected photo was uploaded with Original Upload, the button opens a menu with two choices:
- Download: the 2K copy, with the watermark guests see.
- Download Original: the original file. Photos with no original download as 2K.
For the whole event at once, use Download All Photos in event settings. It emails you download links.
Move photos to another album
- Select the photos.
- Open Move to.. and pick the album.
- The photos move and "Photos moved successfully!" shows.
Move to.. is not shown in the Guest Uploads album.
Delete photos
- Select the photos.
- Click Delete Selected.
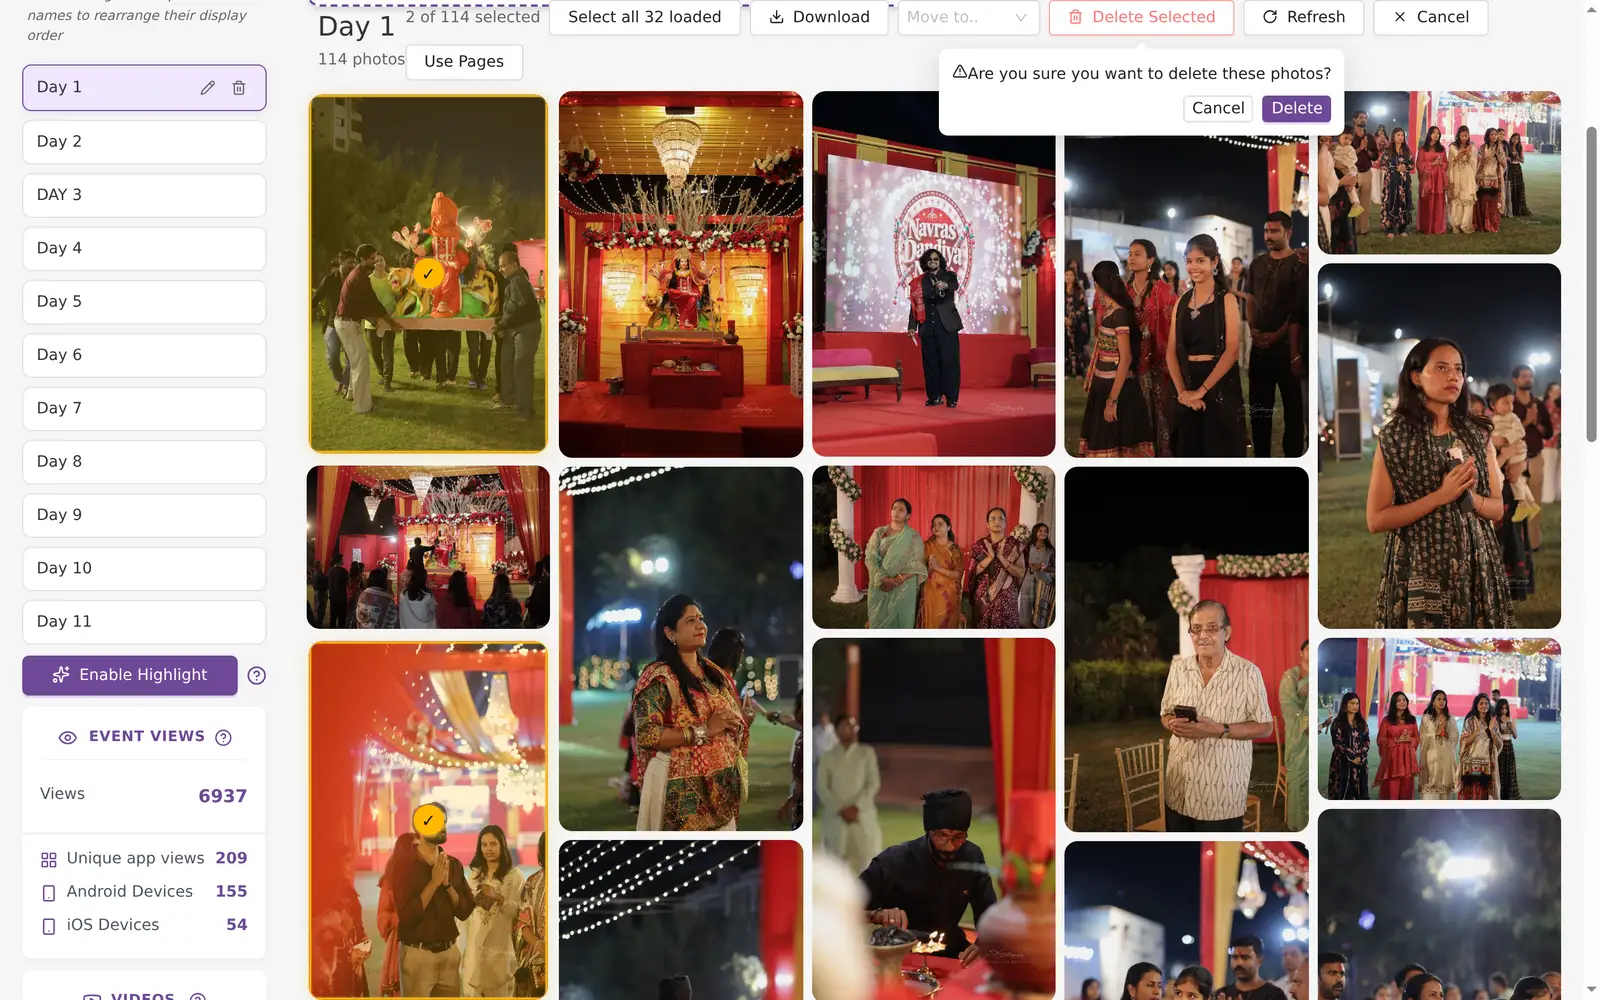
- Kamero asks "Are you sure you want to delete these photos?" Click Delete.
Deleted photos are gone for good. There is no bin to restore them from.
The photo viewer
Click any photo to open it full screen. The top bar has:
- The photo number, for example 14 of 63, and the file name with a copy button.
- Event Cover: makes this photo the event cover, the banner guests see at the top of the web gallery.
- Album Cover: makes this photo the cover of the album it is in. Not available in Guest Uploads.
- Share, Download (with Download Original when the photo has one), Delete and Close.
A photo that is the event cover or an album cover cannot be deleted. Set another photo as the cover first.

- FACES shows the faces Kamero found in the photo. Click SHOW BOXES to outline them. A new photo may show Not indexed yet or Face indexing in progress for a short while.
- DETAILS shows the camera, lens and capture date, and Uploaded by for guest photos.
- The bottom bar has Play for a slideshow, zoom out, Fit, zoom in, full screen, rotate left and right, flip, and Reset. Rotating and flipping only change your view, not the photo.
- On a computer: scroll to zoom, Space to play, Esc to close.
Sort Photos By
The SORT PHOTOS BY card in the left column sets the photo order for the whole event, for you and for guests.
- Capture Time (the default): by when the photo was taken, from the camera data.
- Name: alphabetically by file name.
- Name Sequence: by file name with numbers in order, so 9500 comes before 10941. Use it when your camera numbers passed 9999 during the event.
Pick an option and click Confirm.
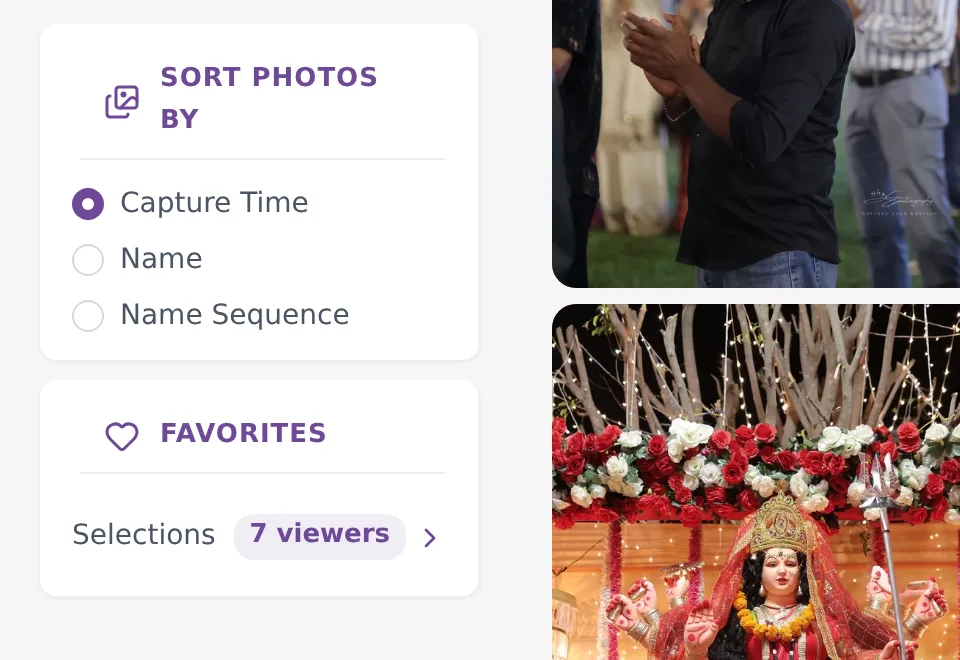
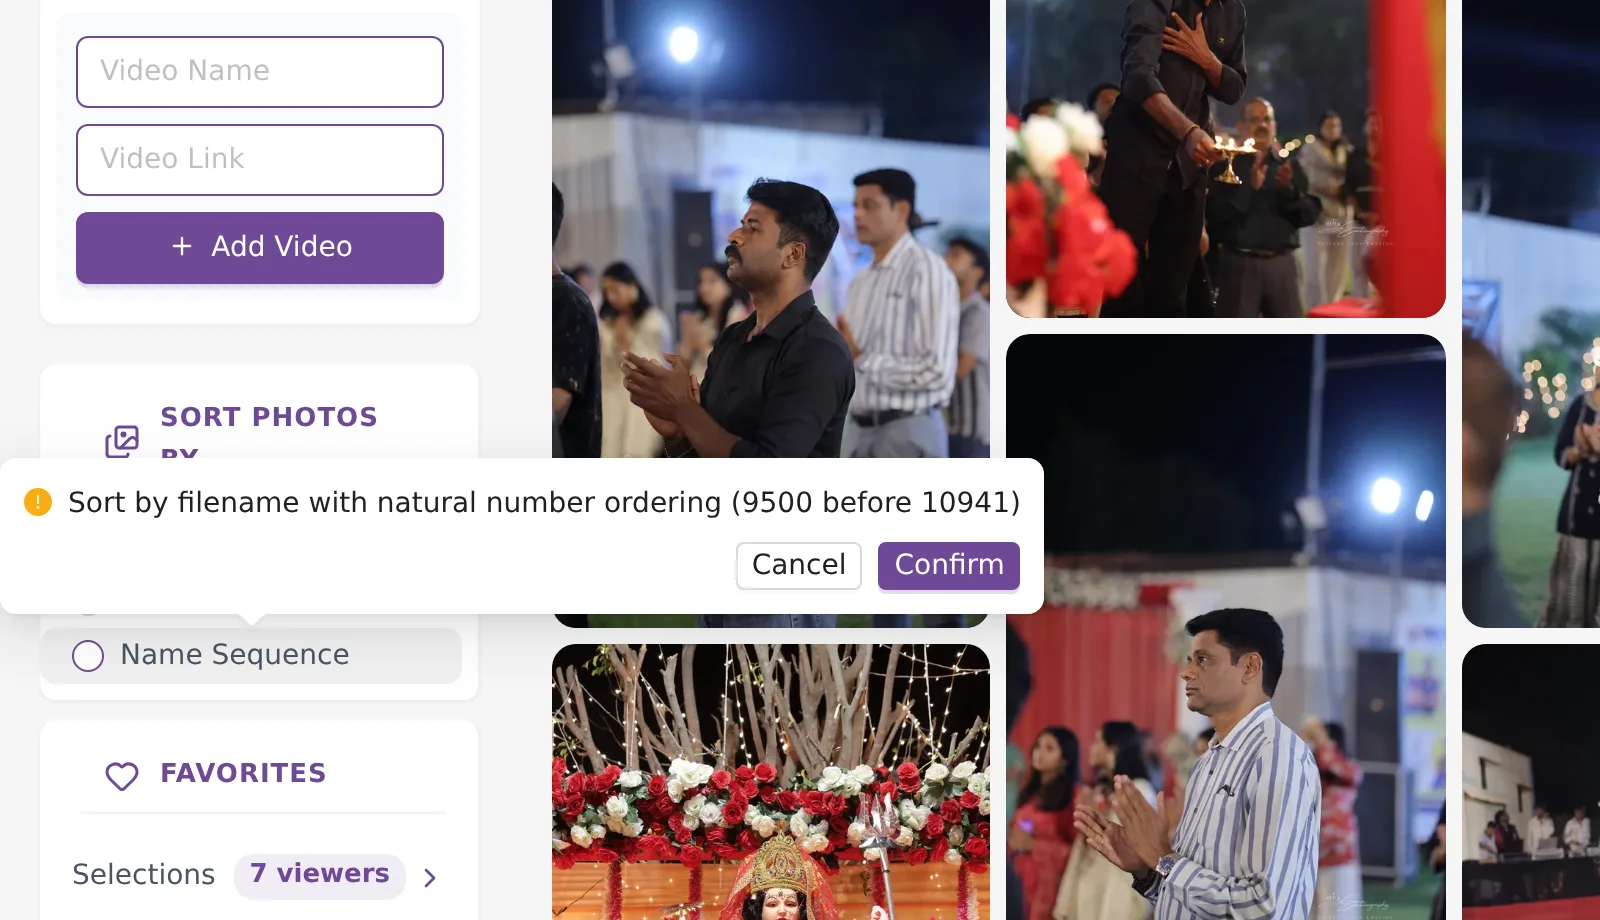
The FAVORITES card below it shows how many guests have picked favourites. See guest favourites.
Pages or endless scroll, and Refresh
Albums load more photos as you scroll. To see numbered pages instead, click Use Pages (Pages on a phone). A Photos per page box appears with 32, 64, 96, 128, 200, 500 or 1000, next to the page numbers and a count such as 1-114 of 114 photos. Click Use infinite load (Infinite on a phone) to go back.
Pages help when you want to select a lot of photos: set 1000 per page and Select all takes the whole page.
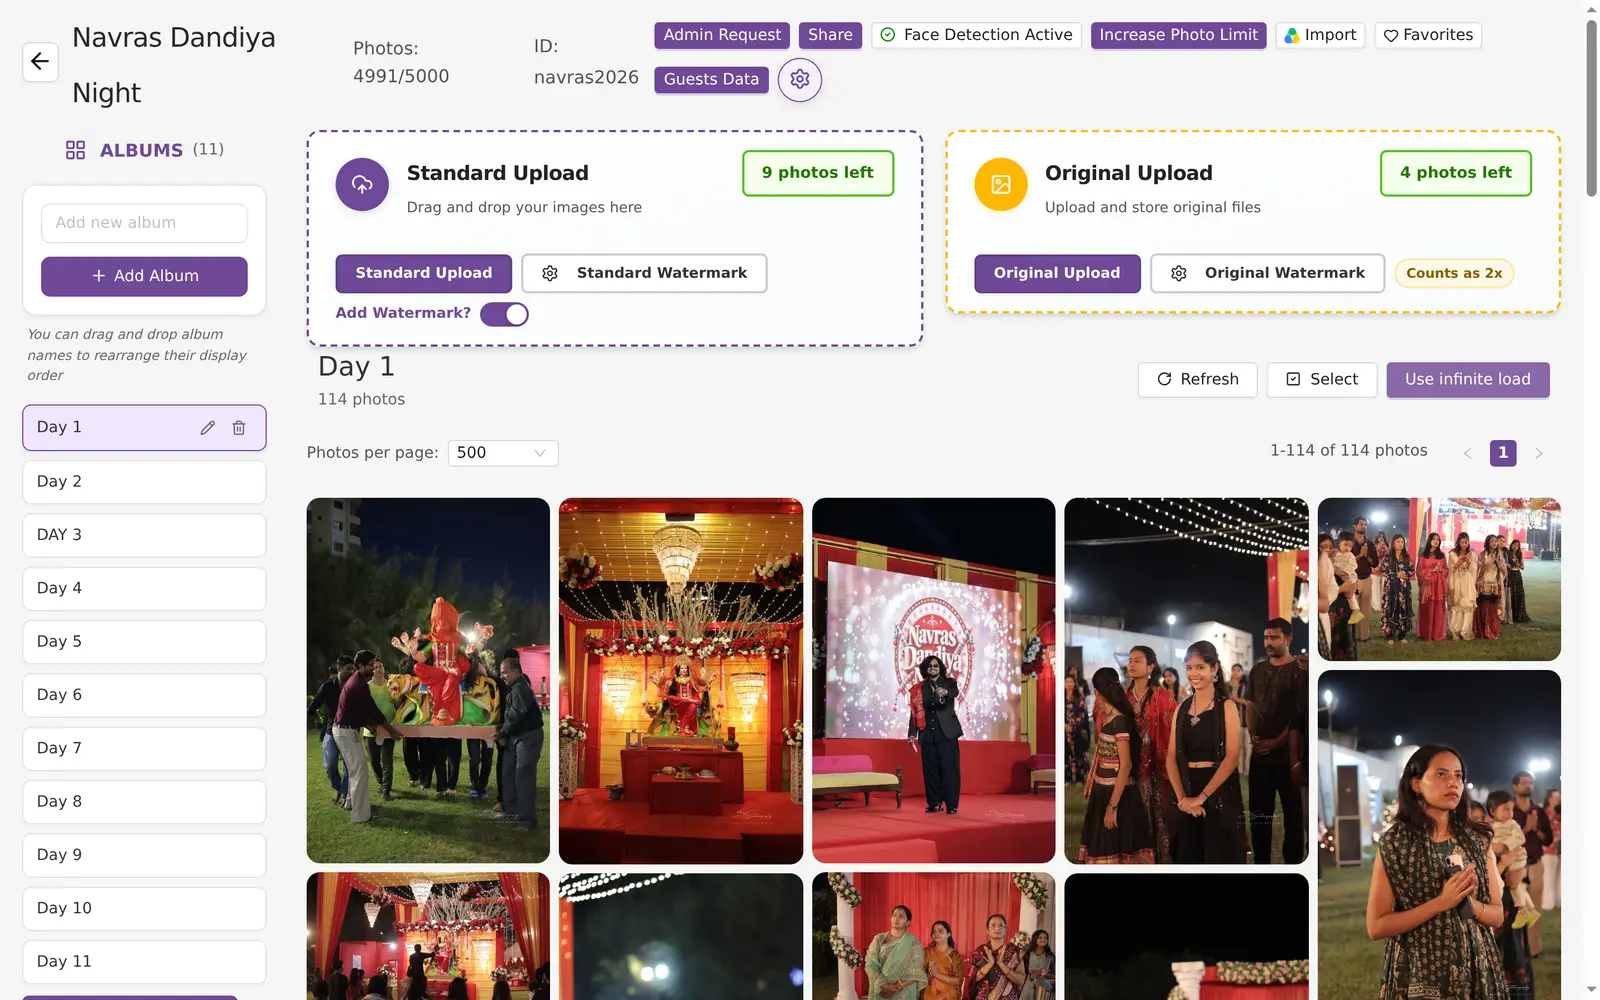
Refresh reloads the album. Use it when photos from Kam-Sync, an import or a guest upload are still arriving.
Common problems
- The album name will not take more letters. Names stop at 20 characters.
- Select all missed photos. It selects loaded photos only. Scroll further or switch to pages with a bigger page size.
- Only one photo downloaded. Your browser blocked the rest. Allow multiple downloads for login.kamero.ai and try again.
- There is no Move to.. or upload panel. You are in Guest Uploads. Pick one of your own albums.
- A photo will not delete in the viewer. It is the event or album cover. Set a different cover first.
- The web gallery banner shows the wrong photo. Open the photo you want and click Event Cover. See also event branding.
To let a guest upload and delete photos for you from the app, see event admin requests.
Frequently asked questions
How long can an album name be?
Up to 20 characters. The Add new album box and the Edit Album Name box stop at 20, so use short names such as Haldi, Day 1 or Stage.
What happens to the photos when I delete an album?
They are deleted with it. The Delete Album dialog says All photos inside will be deleted. If you want to keep the photos, select them and use Move to.. to put them in another album first.
Can I turn the Highlight album off?
There is no switch to turn it off. The only way to remove it is the bin icon on the Highlights album, and that deletes the photos inside it too. Move any photos you want to keep into another album before you delete it.
Do I have to approve guest uploads before other guests see them?
No. There is no approval step. Guest photos appear in the Guest Uploads album as soon as they are uploaded. Open the album and delete any photo you do not want in the event.
Why did Select all not select every photo in the album?
Select all selects only the photos that have loaded on the page so far. The button tells you how many, for example Select all 96 loaded. Scroll down to load more, or switch to Use Pages and set Photos per page to a bigger number, then select again.
Can I download selected photos as one zip?
No. Selected photos download one by one as separate files. To get the whole event in one go, use Download All Photos on the event's Settings page.
Why can't I delete a photo from the viewer?
The photo is set as the Event Cover or the Album Cover. Set another photo as the cover first, then delete this one.
More Events tutorials
Try it in your dashboard
Sign in to Kamero and follow along. Questions? Raise a support ticket from the dashboard.